In this tutorial, you’ll learn how to use jQuery for web scraping. While jQuery is traditionally used for client-side tasks, this guide will also demonstrate its use in server-side scraping, including a complete example of scraping data from the Hacker News website.
What Is Client-Side Scraping?
Client-side scraping involves fetching and processing web content directly from a browser. Or executing JavaScript code within the browser to access and modify the DOM. Typically, this is done using JavaScript, including libraries like jQuery.
Client-side scraping can be achieved by either using a public API or parsing the HTML content of the page. Since most websites do not offer public APIs, you will often need to opt for the latter: downloading HTML documents and extracting data by parsing the content.
You can perform client-side scraping by either calling a public API or parsing the page’s HTML content. Since most websites don’t provide public APIs, you will often need to resort to the latter: downloading HTML documents and extracting data by parsing the content.
Now, let’s explore how to perform client-side scraping with jQuery!
Scraping with jQuery on the Client Side
get() method in jQuery. The get() method in jQuery performs an HTTP GET request and provides the server’s response through a callback function.
Here’s how to use it:
					$.get("https://news.ycombinator.com/", function(html) {
    console.log(html);
});
Now, let’s write some HTML code and add a reference to the jQuery library using the <script> tag.
					!DOCTYPE html>
< html lang="en">
  < head>
    < meta charset="UTF-8" />
    < meta name="viewport" content="width=device-width, initial-scale=1.0" />

    < title>Web Scraping with jQuery< /title>
    < script src="https://code.jquery.com/jquery-3.6.0.min.js">< /script>
  < /head >

  < body >
     JavaScript code
  < /body >
< /html >
Add the following JavaScript code to fetch and log HTML content from a URL using jQuery. Paste this code inside <body> the tag of your HTML document:
					< script >
    $(document).ready(function() {
        $.get("https://news.ycombinator.com/", function(html) {
            console.log(html);
        });
    }); <
/script>
					< !DOCTYPE html>
< html lang="en">
  < head>
    < meta charset="UTF-8" />
    < meta name="viewport" content="width=device-width, initial-scale=1.0" />
    < title>Web Scraping with jQuery
    < script src="https://code.jquery.com/jquery-3.6.0.min.js">
  < /head>

  < body>
    < script>
      $(document).ready(function () {
        $.get("https://news.ycombinator.com/", function (html) {
          console.log(html);
        });
      });
    < /script>
  < /body>
< /html>
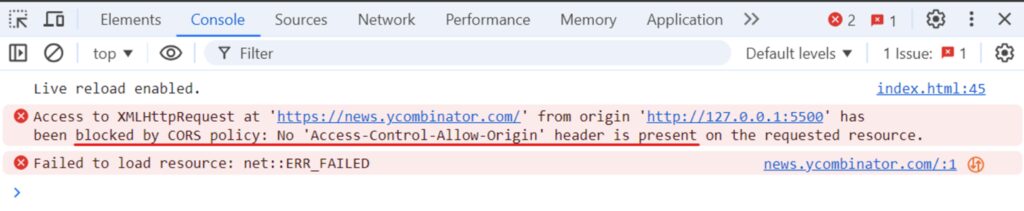
The output indicates that our code won’t work due to a “No ‘Access-Control-Allow-Origin‘ header is present on the requested resource” error, which is related to Cross-Origin Resource Sharing (CORS).
Why does this error occur?
When your browser makes a request to a different domain, it includes an Origin HTTP header for security reasons. The server must respond with an Access-Control-Allow-Origin header to allow access. If this header is missing or incorrect, the browser will block the response to prevent unauthorized access.
To follow CORS rules, servers have security measures in place to block unauthorized requests and allow trusted ones. If the server doesn’t allow requests from your domain, you’ll encounter a CORS error. These CORS restrictions mean that you cannot use JavaScript to scrape web content from a different domain on the client side.
Okay, so how do we scrape a website using jQuery? To bypass the CORS restriction, we can shift our scraping logic to the server side. This allows us to make requests from the server to any website without being blocked by the browser’s security policies. Let’s explore this in more detail in the next section.
Why Choose jQuery for Web Scraping?
jQuery is one of the most widely adopted libraries for DOM manipulation. It provides various selectors to accurately target specific elements on the page, making it easy to extract text content, attributes, or other data from selected elements. For dynamic content, jQuery’s AJAX methods can retrieve additional data without having to reload the entire page.
Scraping with jQuery on the Server Side
To use jQuery in a Node.js environment, you can leverage the jsdom NPM package. By combining jQuery with jsdom, you can effectively query and manipulate the DOM on the server side, just as you would do in a browser.
Setting Up the Environment
Before we start working on the code, let’s make sure we have the right environment set up. You’ll need to have Node.js installed on your computer. If you haven’t installed it yet, you can download it from the official Node.js website.
Once Node.js is installed, follow these steps to set up your project:
1. Initialize a New Node.js Project Open the terminal, create a new directory for your project, navigate to this directory, and run the npm init -y command to initialize a new Node.js project.
					 mkdir jquery-scraper
cd jquery-scraper
npm init -y
This will create a package.json file.
2. Install jsdom and jQuery Install the required packages, jsdom and jquery, using npm:
npm install jsdom jquery
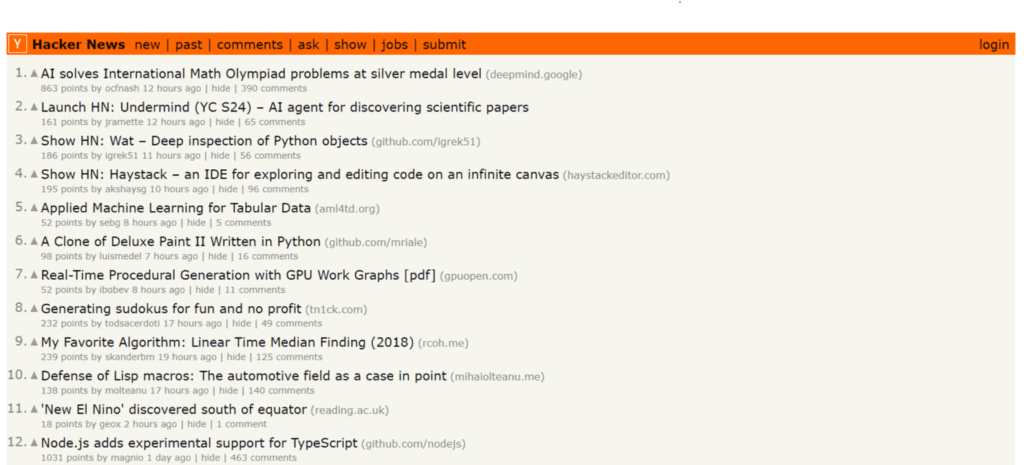
Now you can use jQuery in Node.js for scraping! Let’s put it to use by building a scraper to extract data from the Hacker News website.
Here’s what our target page looks like:
Fetching HTML with jQuery get()
The first step in any web scraping process is to fetch the HTML of the target web page. The jQuery get() method loads data from the server using an HTTP GET request.
Let’s write a Node.js script that uses the jsdom library to create a simulated browser environment and the jquery library to perform an HTTP GET request to fetch the HTML content of the Hacker News:
					const { JSDOM } = require("jsdom");

// Initialize JSDOM on the "https://news.ycombinator.com/" page to avoid CORS problems
const { window } = new JSDOM("", {
    url: "https://news.ycombinator.com/",
});

const $ = require("jquery")(window);

$.get("https://news.ycombinator.com/", function (html) {
    console.log(html);
});
In the code, we first start by importing the JSDOM class from the jsdom library. jsdom allows us to create a simulated browser environment within Node.js. Then, we create a jsdom instance by providing the URLs we want to simulate. The result is stored in a new variable called window.
This window object represents the simulated browser window, similar to the window object you would have access to in a real browser.
Next, we import the jQuery library and pass the window object. This integrates jQuery into the simulated environment, allowing us to utilize its functionalities.
Finally, we use jQuery’s get() method to fetch the HTML content from the specified URL.
Run the code and you’ll see the following output:
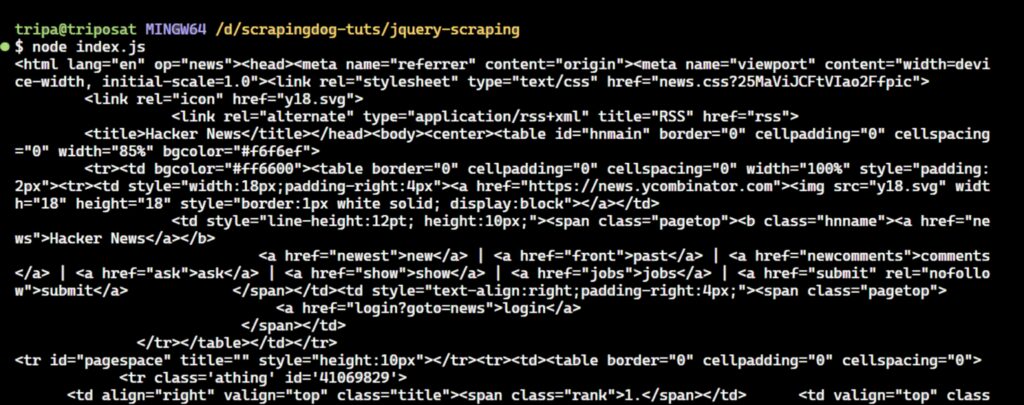
That’s the HTML content of the Hacker News!
Extracting Data with jQuery find()
Given a jQuery object representing a set of DOM elements, the .find() method allows you to search for descendant elements within the DOM tree and create a new jQuery object containing the matching elements.
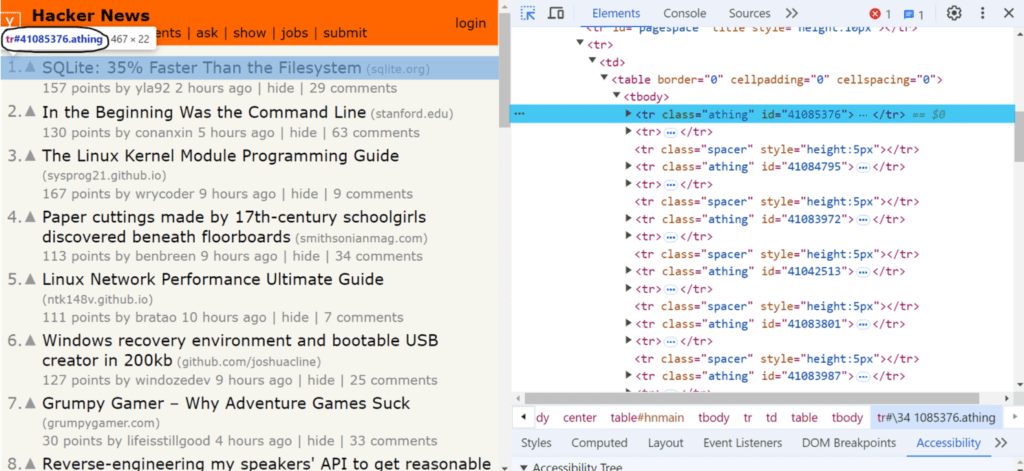
The .find() and .children() methods are similar, but .children() only select elements that are direct children of the original set. As shown in the image below, the CSS selector for identifying news elements is tr.athing. You can use the .find() method to retrieve a list of these HTML elements.
The jQuery .find() method returns a set of DOM elements that match the CSS selector, jQuery object, or HTML element passed as the parameter.
In our case, we use jQuery to find all elements with the class tr.athing within the retrieved HTML. These elements represent individual news items on the Hacker News website. Take a look at the below code snippet:
					 $.get("https://news.ycombinator.com/", function(html) {
    const newsItemElements = $(html).find("tr.athing");
});
Next, we iterate over each news item element to individually extract its rank, title, and URL. We use jQuery’s .each() method to process these elements one by one.
					$.get("https://news.ycombinator.com/", function(html) {
    const newsHTMLElements = $(html).find("tr.athing");

    newsHTMLElements.each((i, newsItemElement) => {
        // Code to extract data from each news item will go here
    });
});
For each news item, we locate the element containing the rank. This is a span element with the class “rank”. The .find() method is used to locate the span, and the .text() method extracts its content.
					$.get("https://news.ycombinator.com/", function(html) {
    const newsHTMLElements = $(html).find("tr.athing");

    newsHTMLElements.each((i, newsItemElement) => {
        const rank = $(newsItemElement).find("span.rank").text().replace('.', '');
    });
});
Finally, we find the element containing the title and URL of the news item. This is an anchor (<a>) element within a span with the class “titleline”. We extract the text of the title directly from the anchor and the URL from its href attribute.
					$.get("https://news.ycombinator.com/", function(html) {
    const newsHTMLElements = $(html).find("tr.athing");

    const newsItems = [];
    newsHTMLElements.each((i, newsItemElement) => {
        const rank = $(newsItemElement).find("span.rank").text().replace('.', '');
        const titleElement = $(newsItemElement).find("span.titleline > a");
        const title = titleElement.text();
        const url = titleElement.attr("href");

        // Store the extracted data
        newsItems.push({
            rank,
            title,
            url
        });
    });

    // Log the extracted data
    console.log(newsItems);
});
You can extract additional details for each news item, such as the author name, points, and post time, from the next tr element after the current tr.athing element. This subsequent tr element has a td with the class “subtext” where the data is present.
Here’s the code to extract additional details:
					$.get("https://news.ycombinator.com/", function(html) {
    const newsHTMLElements = $(html).find("tr.athing");

    const newsItems = [];
    newsHTMLElements.each((i, newsItemElement) => {
        const rank = $(newsItemElement).find("span.rank").text().replace('.', '');
        const titleElement = $(newsItemElement).find("span.titleline > a");
        const title = titleElement.text().trim();
        const url = titleElement.attr("href");

        // Extract additional details
        const subtext = $(newsItemElement).next().find(".subtext");
        const author = subtext.find("a.hnuser").text();
        const points = subtext.find("span.score").text();
        const postTime = subtext.find("span.age").text();

        // Store the extracted data
        newsItems.push({
            rank,
            title,
            url,
            author,
            points,
            postTime
        });
    });

    console.log(newsItems);
});
We use the next().find(".subtext") method, which selects the tr element immediately after the current tr.athing element and then finds the element with the class subtext.
To extract additional details about each news item, you need to locate the subtext class, which contains information such as the author’s name, points, and post time.
The subtext class is located in the next tr element following the current tr.athing element.
You can use the next().find(".subtext") method, which selects the tr element immediately after the current tr.athing element and then finds the element with the class subtext.
Once you have the subtext element, you can extract desired data from it. To get the author’s name, you can use subtext.find("a.hnuser"). Similarly, you can find the number of points and the post time.
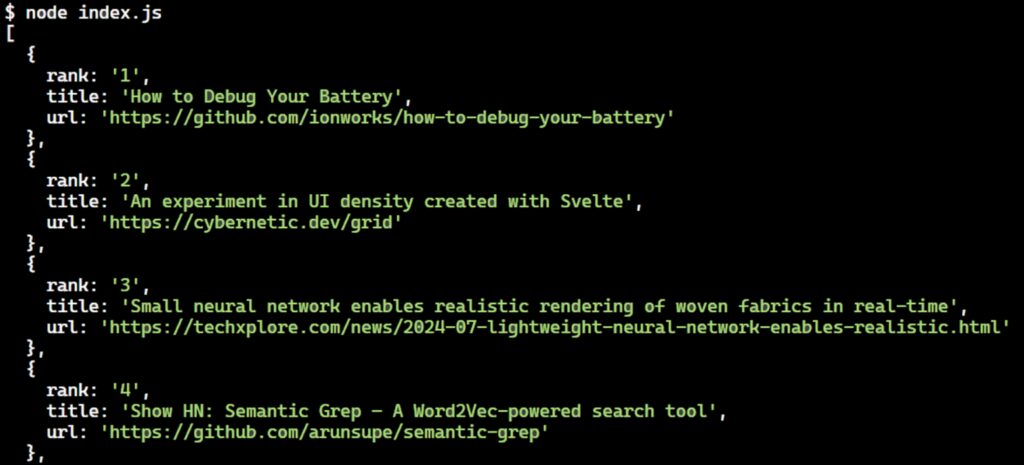
Run the code and you will see the extracted news items logged in the console, like this:
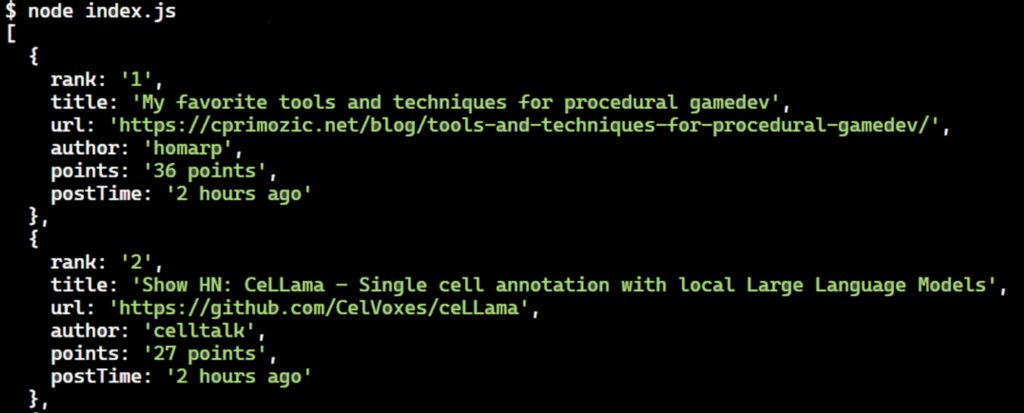
Nice! We’ve successfully extracted all the desired data from the first page of Hacker News. However, this is not enough, as we need to fetch data from multiple pages. Let’s explore how to scrape multiple pages by handling pagination.
Handling Pagination to Scrape Multiple Pages
Hacker News only displays a limited number of items on each page. Pagination allows you to navigate through multiple pages to collect all available news articles, not just those on the first page.
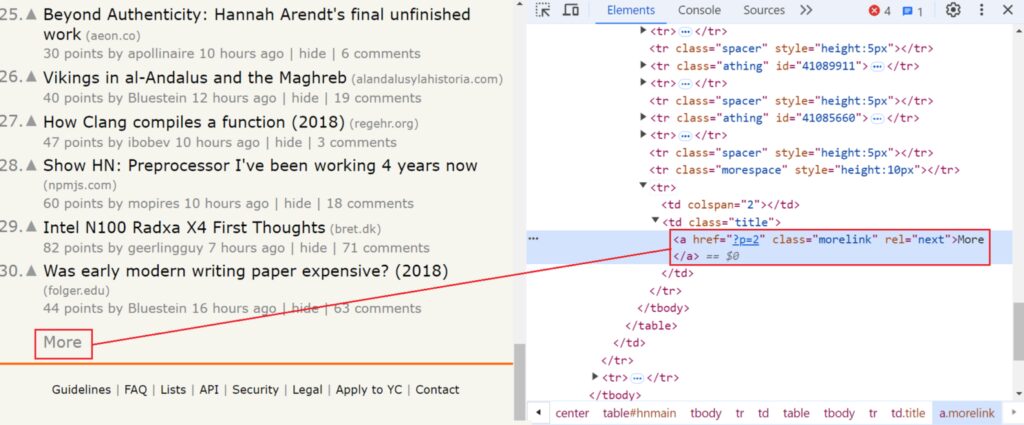
On the Hacker News website, if you scroll to the bottom of the page, you will see a “more” button. Clicking this button loads additional news items and updates the URL.
For example, if the initial URL is:
Clicking “more” would change the URL to:
https://news.ycombinator.com/?p=2
With each subsequent click, the page number (p) will increase by 1 until there are no more pages to display.
Take a look at the below image:
					// Check for next page link
const nextPageLink = $(html).find("a.morelink").attr("href");
if (nextPageLink) {
    currentPage += 1;
    fetchPage(currentPage);
} else {
    console.log(newsItems);
}
The code shows that, if the next page link is present, the script increments the currentPage variable by 1. It then recursively calls the fetchPage function with the updated currentPage value to fetch and process the next page.
If no “next page” link is found, it means there are no more pages to fetch. At this point, the script stops fetching further pages and logs the collected news items to the console.
Here’s the complete code:
					const { JSDOM } = require("jsdom");

// Initialize JSDOM with the target URL
const { window } = new JSDOM("", {
    url: "https://news.ycombinator.com/",
});

const $ = require("jquery")(window);

const baseUrl = "https://news.ycombinator.com/";
let currentPage = 1;
const newsItems = [];

// Function to fetch a page of news items
function fetchPage(page) {
    $.get(`${baseUrl}?p=${page}`, function (html) {
        const newsHTMLElements = $(html).find("tr.athing");

        newsHTMLElements.each((i, newsItemElement) => {
            const rank = $(newsItemElement).find("span.rank").text().replace('.', '');
            const titleElement = $(newsItemElement).find("span.titleline > a");
            const title = titleElement.text().trim();
            const url = titleElement.attr("href");

            // Extract additional details
            const subtext = $(newsItemElement).next().find(".subtext");
            const author = subtext.find("a.hnuser").text();
            const points = subtext.find("span.score").text();
            const postTime = subtext.find("span.age").text();

            // Store the extracted data
            newsItems.push({
                rank,
                title,
                url,
                author,
                points,
                postTime
            });
        });

        // Check for next page link
        const nextPageLink = $(html).find("a.morelink").attr("href");
        if (nextPageLink) {
            currentPage += 1;
            fetchPage(currentPage);
        } else {
            console.log(newsItems);
        }
    }).fail(function (error) {
        console.error(`Error fetching page ${page}:`, error);
    });
}

// Start fetching from the first page
fetchPage(currentPage);
When the code runs, this would print:
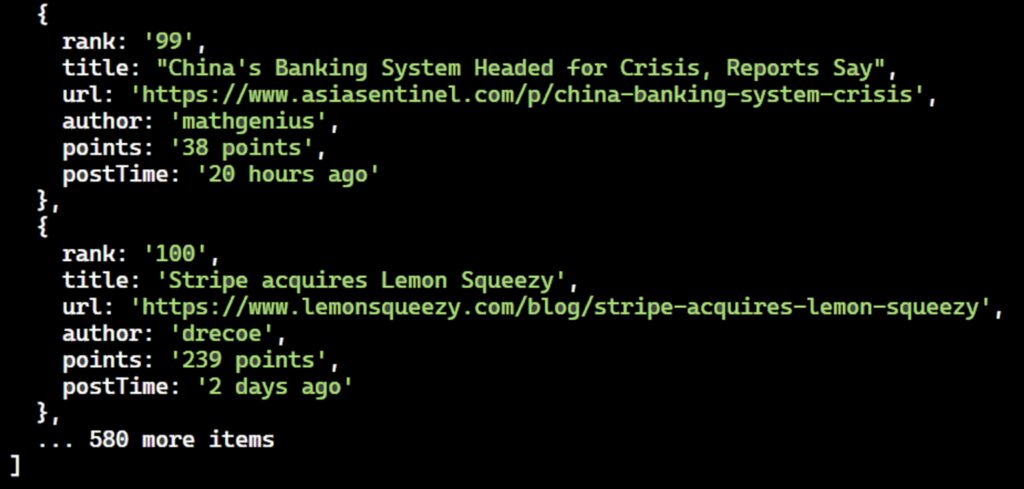
Great! We’ve successfully extracted data from multiple pages using the pagination technique.
Exporting Scraped Data
Scraping data from the web is often the initial step in a larger workflow. The scraped data can be used for multiple purposes. To make the most of the gathered data, it is crucial to convert it into a format that is easy to read, analyze, and manipulate. Some of the common formats include CSV and JSON.
Let’s start by discussing how to store the scraped data in a CSV file.
To export the scraped data to a CSV file in Node.js, you can utilize the fs (File System) module to write the data. Here’s how to modify your script:
- Import the necessary
fsmodule. - Convert the
newsItemsarray into CSV format. - Write the CSV data to a file.
Here’s the full code:
const { JSDOM } = require("jsdom");
const fs = require("fs");
const { window } = new JSDOM("", {
url: "https://news.ycombinator.com/",
});
const $ = require("jquery")(window);
const baseUrl = "https://news.ycombinator.com/";
let currentPage = 1;
const newsItems = [];
// Function to fetch a page of news items
function fetchPage(page) {
$.get(`${baseUrl}?p=${page}`, function(html) {
const newsHTMLElements = $(html).find("tr.athing");
newsHTMLElements.each((i, newsItemElement) => {
const rank = $(newsItemElement).find("span.rank").text().replace('.', '');
const titleElement = $(newsItemElement).find("span.titleline > a");
const title = titleElement.text().trim();
const url = titleElement.attr("href");
// Extract additional details
const subtext = $(newsItemElement).next().find(".subtext");
const author = subtext.find("a.hnuser").text();
const points = subtext.find("span.score").text();
const postTime = subtext.find("span.age").text();
// Store the extracted data
newsItems.push({
rank,
title,
url,
author,
points,
postTime
});
});
// Check for next page link
const nextPageLink = $(html).find("a.morelink").attr("href");
if (nextPageLink) {
currentPage += 1;
fetchPage(currentPage);
} else {
exportToCSV(newsItems);
}
}).fail(function(error) {
console.error(`Error fetching page ${page}:`, error);
});
}
// Function to export the data to a CSV file
function exportToCSV(data) {
const csvHeaders = ['Rank', 'Title', 'URL', 'Author', 'Points', 'Post Time'];
const csvRows = [
csvHeaders.join(','),
...data.map(item => [
item.rank,
`"${item.title}"`,
item.url,
item.author,
item.points,
item.postTime
].join(','))
].join('\n'); // Join all rows with newline characters
// Write the CSV string to a file
fs.writeFile("newsItems.csv", csvRows, (err) => {
if (err) {
console.error("Error writing to CSV file:", err);
} else {
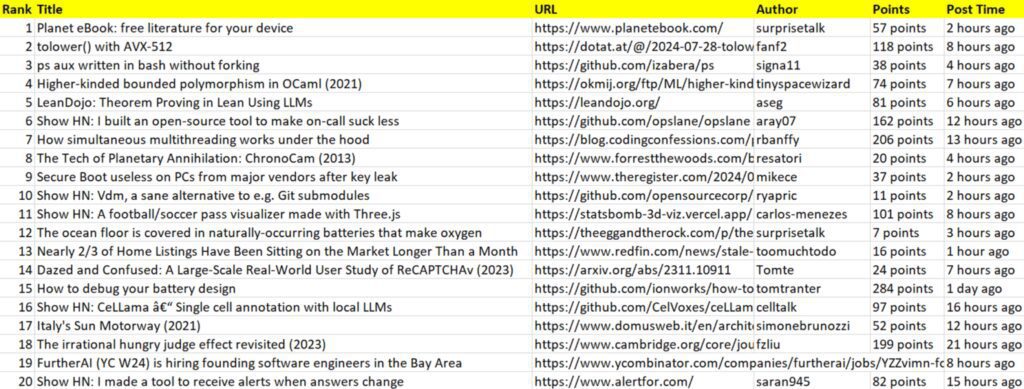
console.log("Data successfully exported to newsItems.csv");
}
});
}
fetchPage(currentPage);
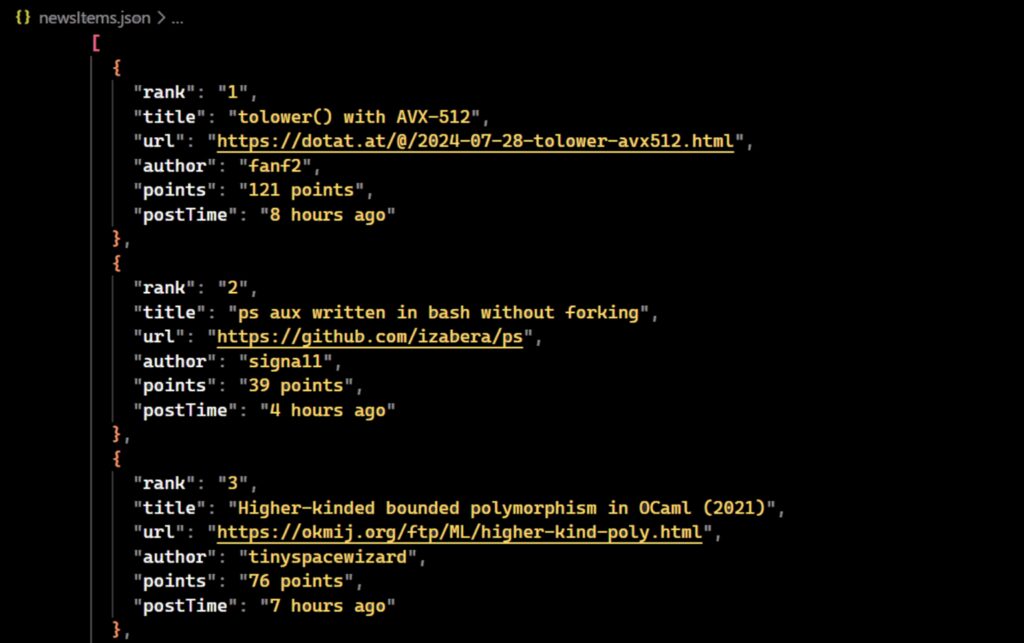
newsItems array into a JSON format and then saves it to a file. In the function, you’ll need to convert the newsItems array into a JSON string by using JSON.stringify, and then write the JSON string to a file named newsItems.json using the fs.writeFile method from the fs module of the Node.js.
Here’s the full code:
					const { JSDOM } = require("jsdom");
const fs = require("fs");

const { window } = new JSDOM("", {
    url: "https://news.ycombinator.com/",
});
const $ = require("jquery")(window);

const baseUrl = "https://news.ycombinator.com/";
let currentPage = 1;
const newsItems = [];

// Function to fetch a page of news items
function fetchPage(page) {
    $.get(`${baseUrl}?p=${page}`, function (html) {
        const newsHTMLElements = $(html).find("tr.athing");

        newsHTMLElements.each((i, newsItemElement) => {
            const rank = $(newsItemElement).find("span.rank").text().replace('.', '');
            const titleElement = $(newsItemElement).find("span.titleline > a");
            const title = titleElement.text().trim();
            const url = titleElement.attr("href");

            // Extract additional details
            const subtext = $(newsItemElement).next().find(".subtext");
            const author = subtext.find("a.hnuser").text();
            const points = subtext.find("span.score").text();
            const postTime = subtext.find("span.age").text();

            // Store the extracted data
            newsItems.push({ rank, title, url, author, points, postTime });
        });

        // Check for next page link
        const nextPageLink = $(html).find("a.morelink").attr("href");
        if (nextPageLink) {
            currentPage += 1;
            fetchPage(currentPage);
        } else {
            exportToJSON(newsItems);
        }
    }).fail(function (error) {
        console.error(`Error fetching page ${page}:`, error);
    });
}

// Function to export data to a JSON file
function exportToJSON(data) {
    const jsonData = JSON.stringify(data, null, 2);

    // Write the JSON string to a file
    fs.writeFile("newsItems.json", jsonData, (err) => {
        if (err) {
            console.error("Error writing to JSON file:", err);
        } else {
            console.log("Data successfully exported to newsItems.json");
        }
    });
}

// Start fetching from the first page
fetchPage(currentPage);
Conclusion
We tried to make this tutorial beginner-friendly. However, there are limitations when doing it on the client side. To understand more, you can read this full tutorial on Web scraping with JavaScript & NodeJs.
Also, if you are looking for a scraping solution without any limitations you can try Scrapingdog web scraping API.
Additional Resources
Web Scraping with Scrapingdog