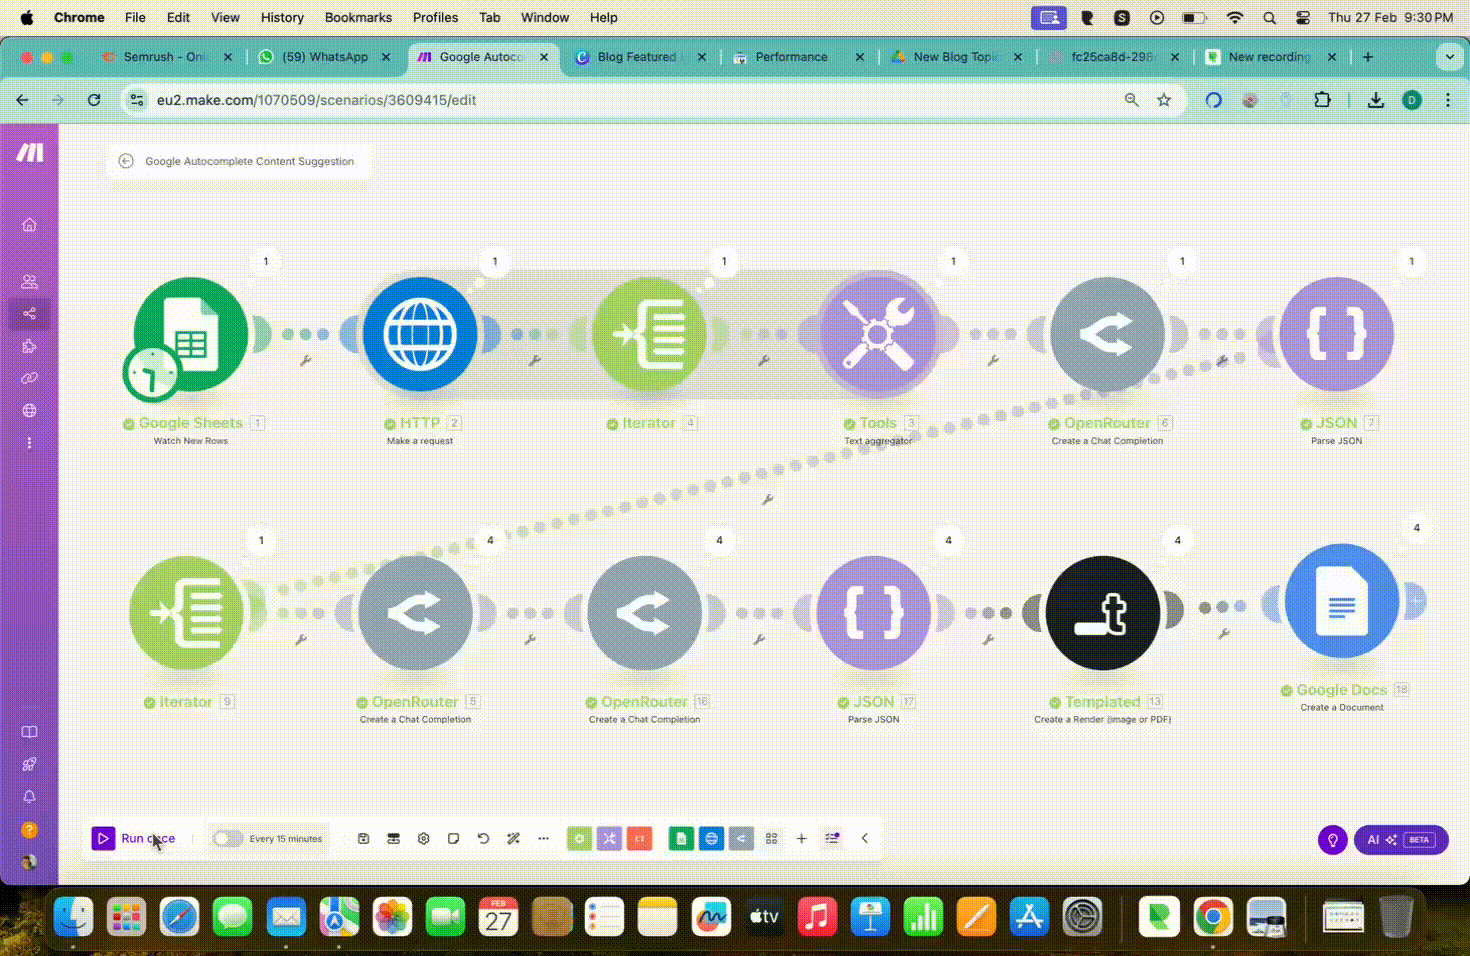
The above video tells how our automation runs!! Let’s build it step by step!!
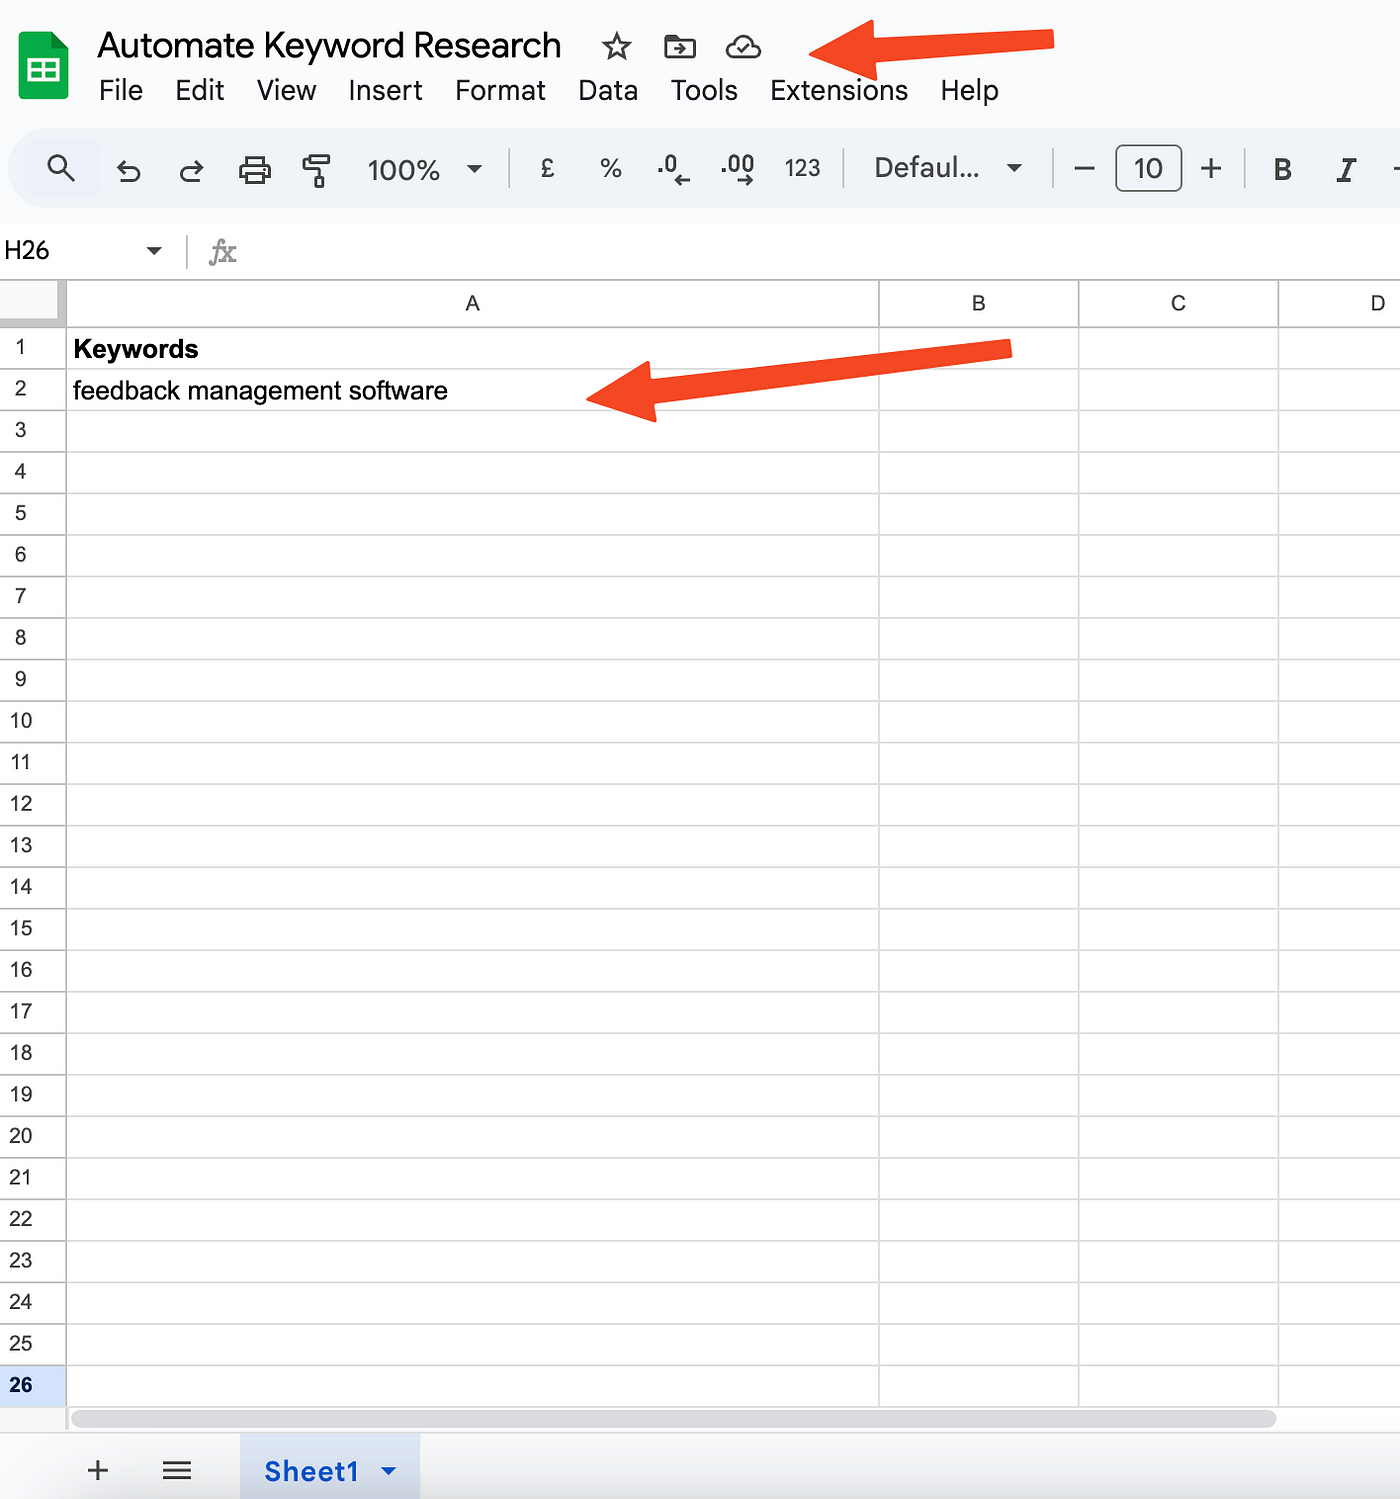
The first module is a Google Sheet module, where we will store our seed keyword & from this keyword, a list of Google suggestions comes & the further modules work on the data.
Note — This automation can help big teams, but small teams or startups starting on their content marketing efforts can leverage the most from it. Since you will be just beginning, it would be a great way to start your marketing efforts.
Here is my Google Sheet, with one of the tabs intended to contain all the seed keywords ⬇️
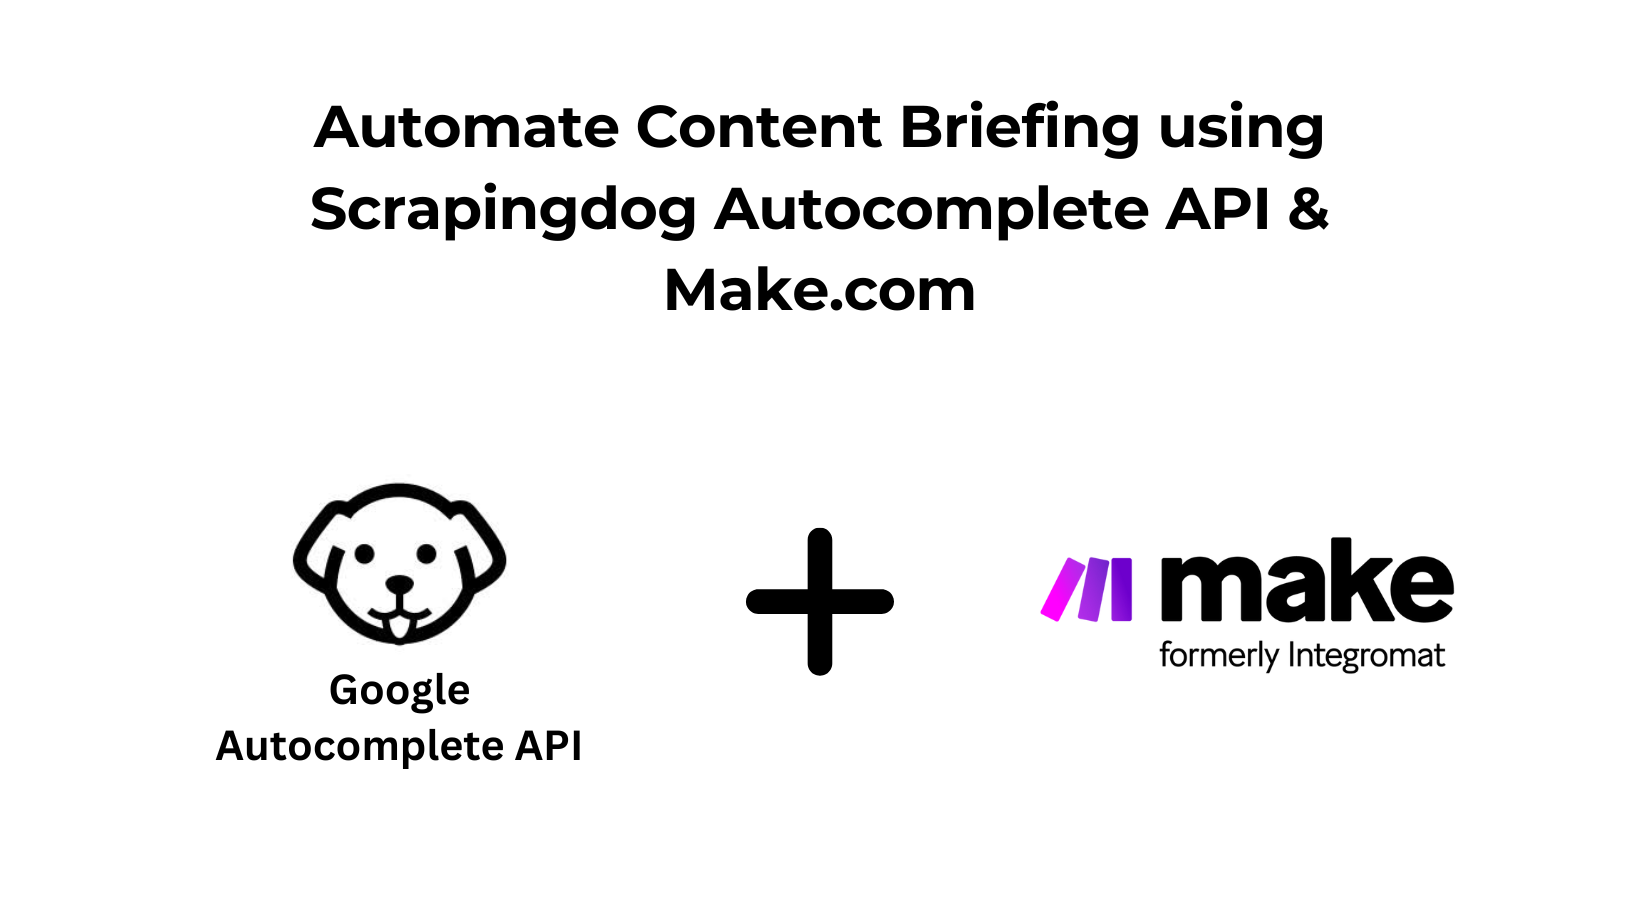
Next, is setting up the HTTP module, where I will set up my Google Autocomplete API setup using Scrapingdog’s API.
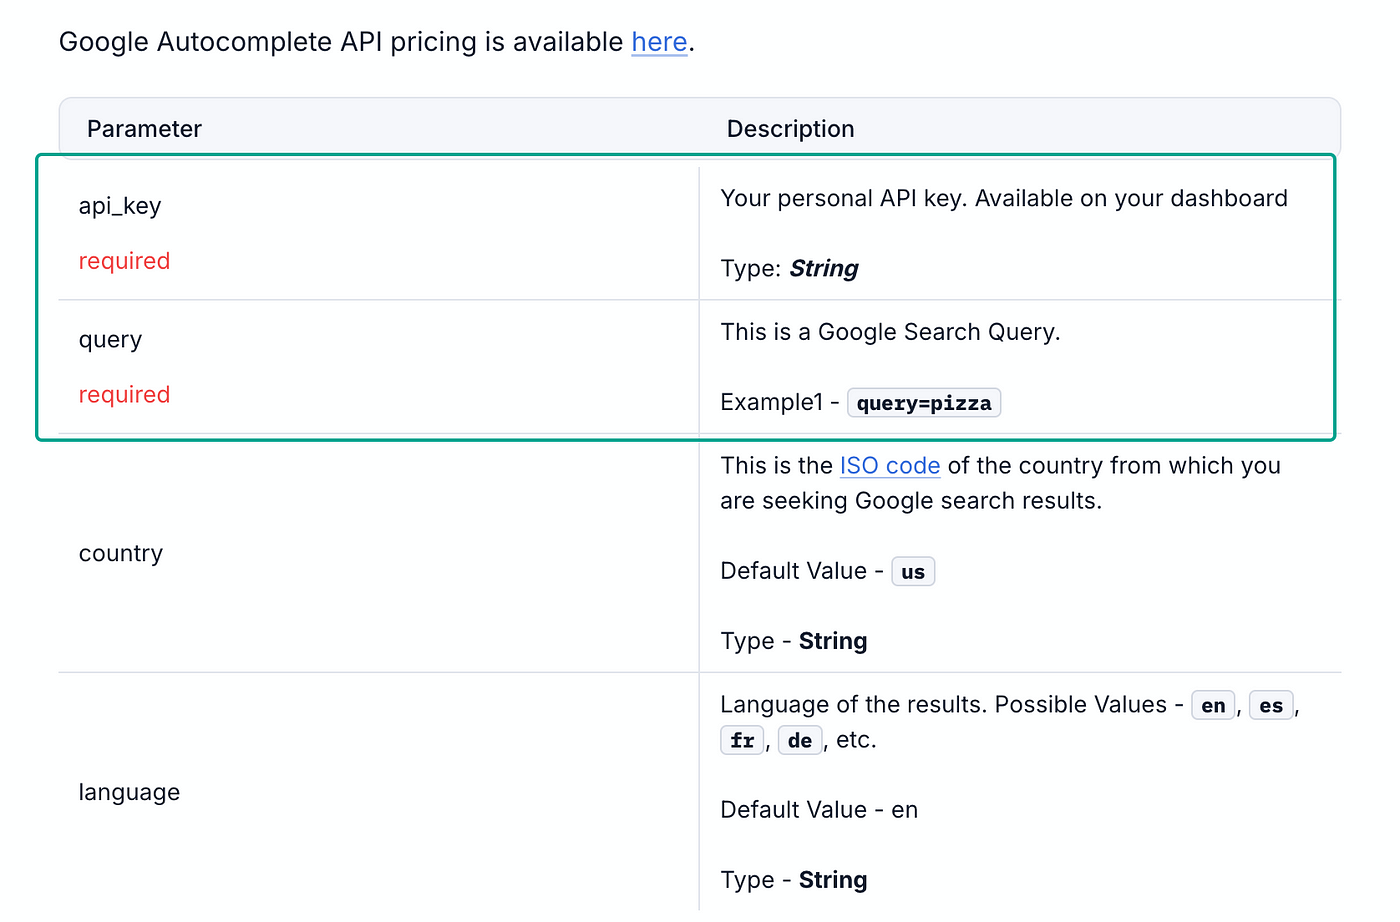
Now before we move on to our next module, I would recommend you go through the documentation of Google Autocomplete API to see how it works & the input parameters it uses to get results.
Here are some of the necessary input parameters ⬇
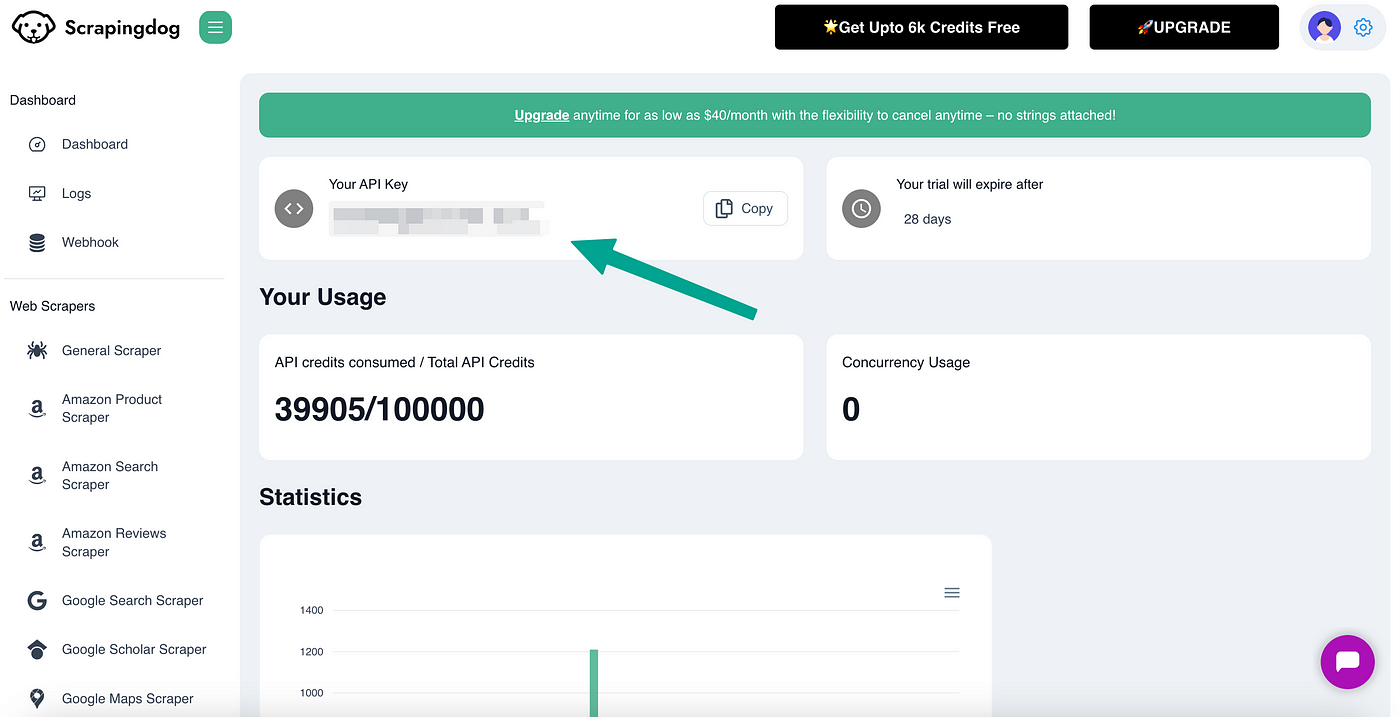
F️or the api_key, you need to sign up for Scrapingdog, the good thing is that you get 1000 free credits to test the API.
When you sign up, you get your key on the dashboard of the Scrapingdog interface ⬇️
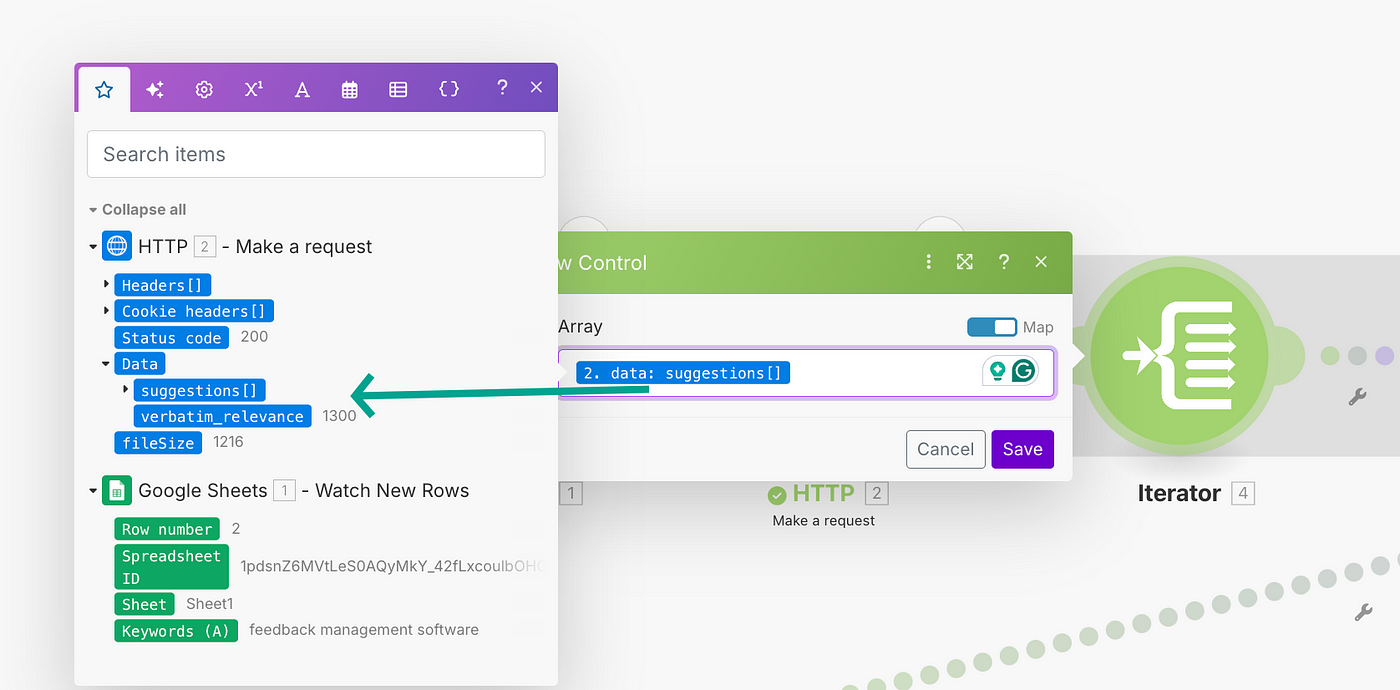
Back to our Make scenario, we will now make the API call to get all the Google Autosuggested keywords.
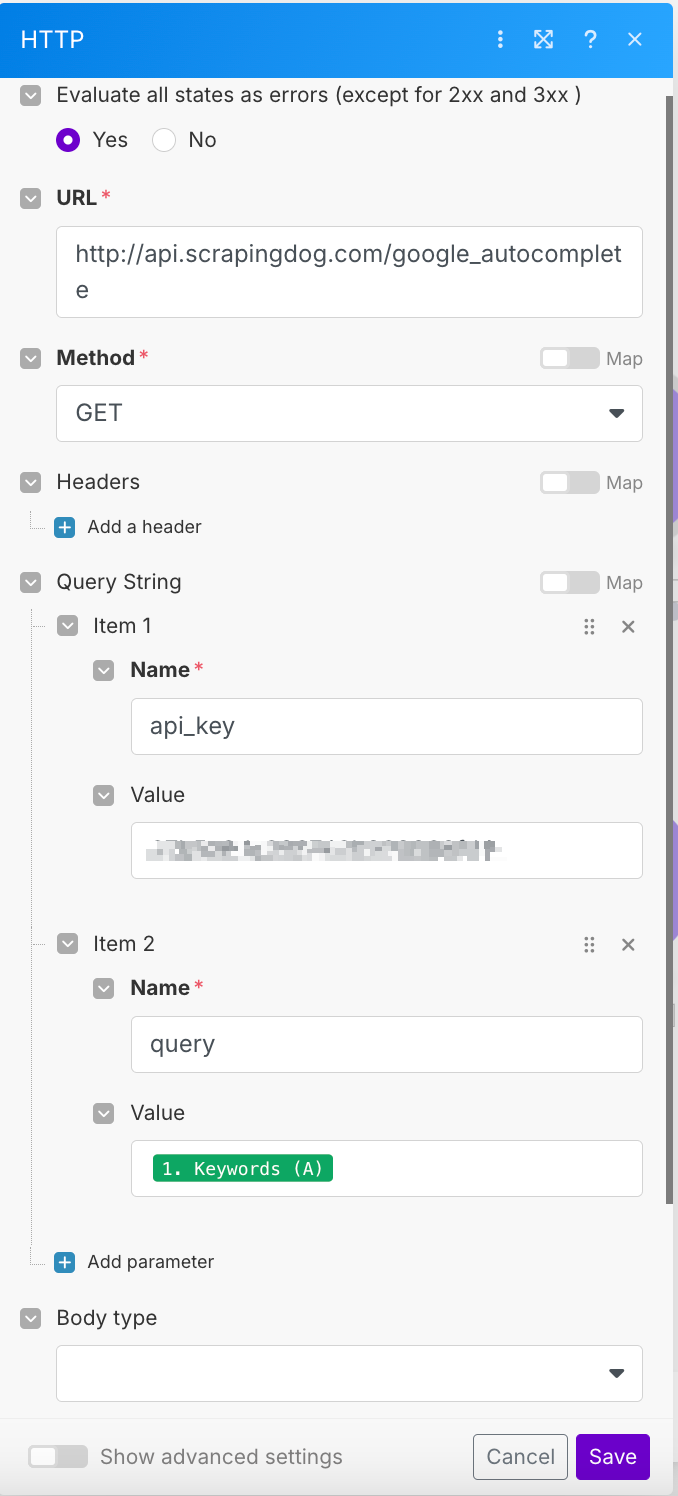
Since we have two necessary input parameters, I will copy and paste my API_Key as is here, and for the query, the value is taken from the row in my previous Google Sheet module.
Let’s test this scenario up until here, to see what data our HTTP module gives.
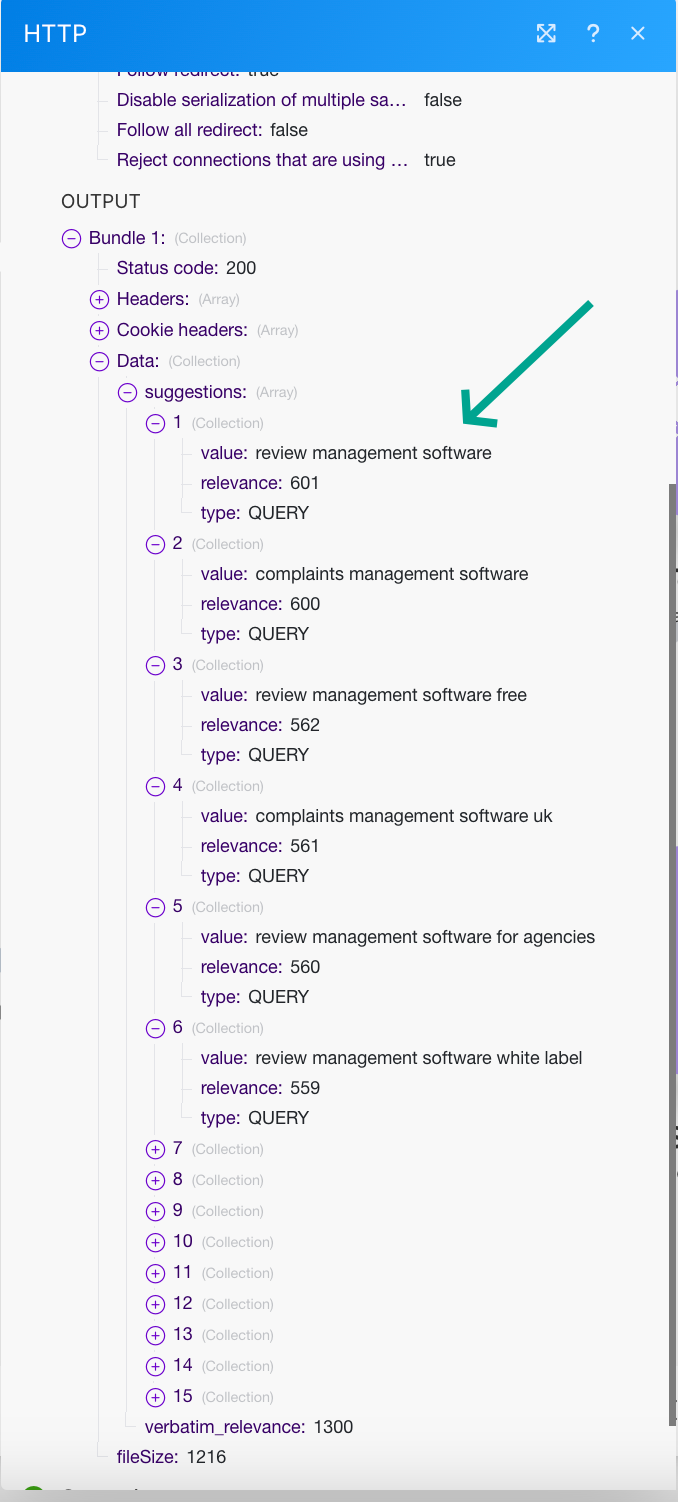
So we are getting the data correct, as you can see from the image above. Let’s connect the next module.
Quick Tip — Whether you are creating automation via Programming languages or by no-code tools like Make, it is advisable to check them at every step as you create, that way you won’t have to debug when the whole scenario is ready. Further, if there is a problem, it will be resolved at the same time.
The next module will be an iterator, which will iterate on the Array of Google suggestions we received in the previous module.
That way we will get all the suggestions(keywords) in different bundles in one output.
Now we need to aggregate all these keywords into one text string, the module we will use is ‘Text Aggregator’.
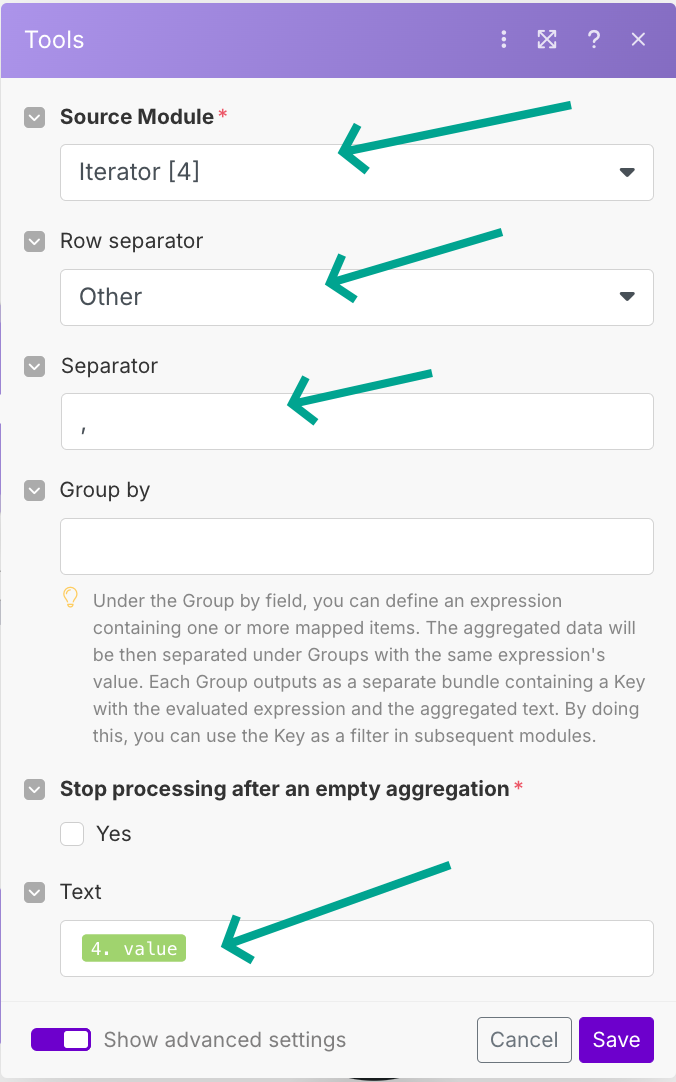
Join the module, and toggle the advanced setting on, as you can see in the image above. Select the fields as shown, this will make a text string of all the previous keywords with a comma (,) separator.
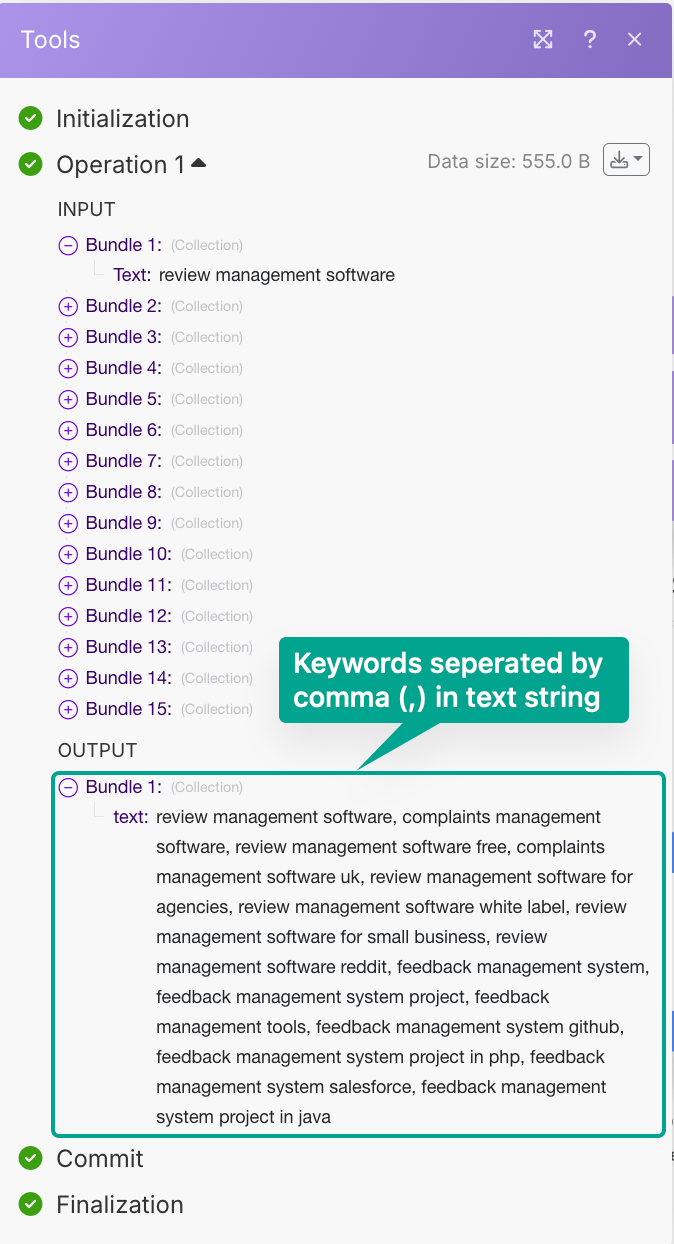
See the output of this module below ⬇️
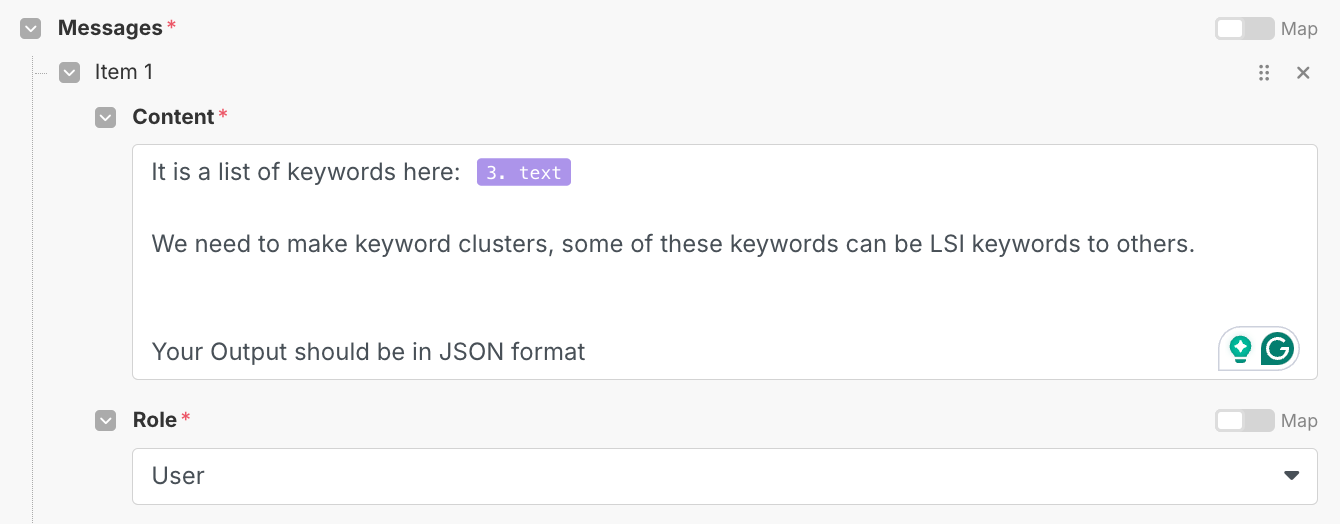
Great!! Now, we will feed this text string to AI module to make keyword clusters. This way we can manage similar/LSI keywords in one cluster and avoid canonicalization when creating our blog post.
To use AI in our scenario, we will be using a service called OpenRouter, it has a collection of many LLMs & therefore we can use any LLM through this service.
For the ‘User’ prompt, I am giving this content to my AI model.
For the System prompt, we will give a sample JSON output data (we want to get the data in JSON format, that way it would be easy to move that data into our next corresponding modules.)
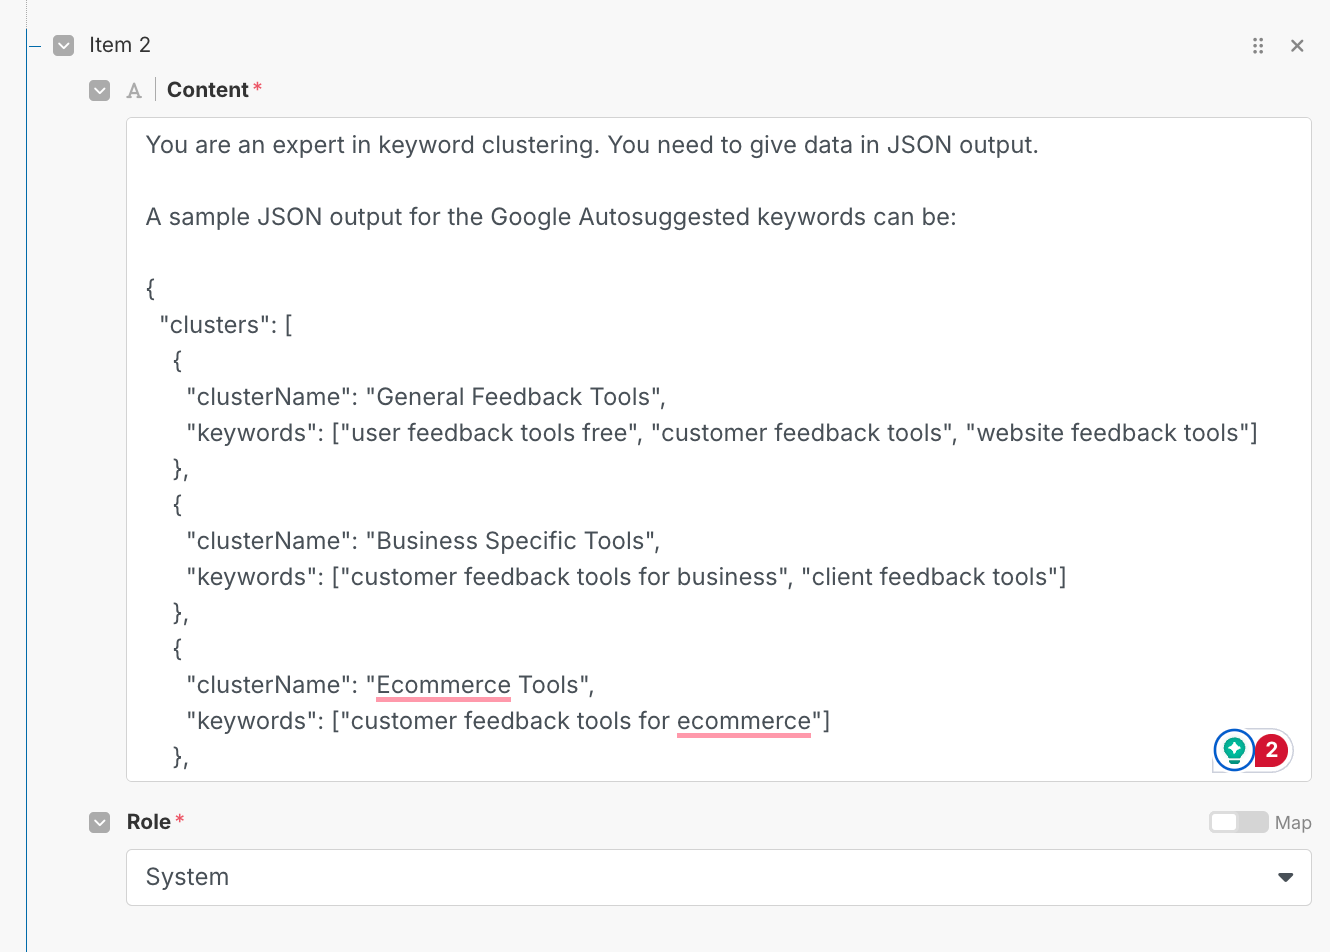
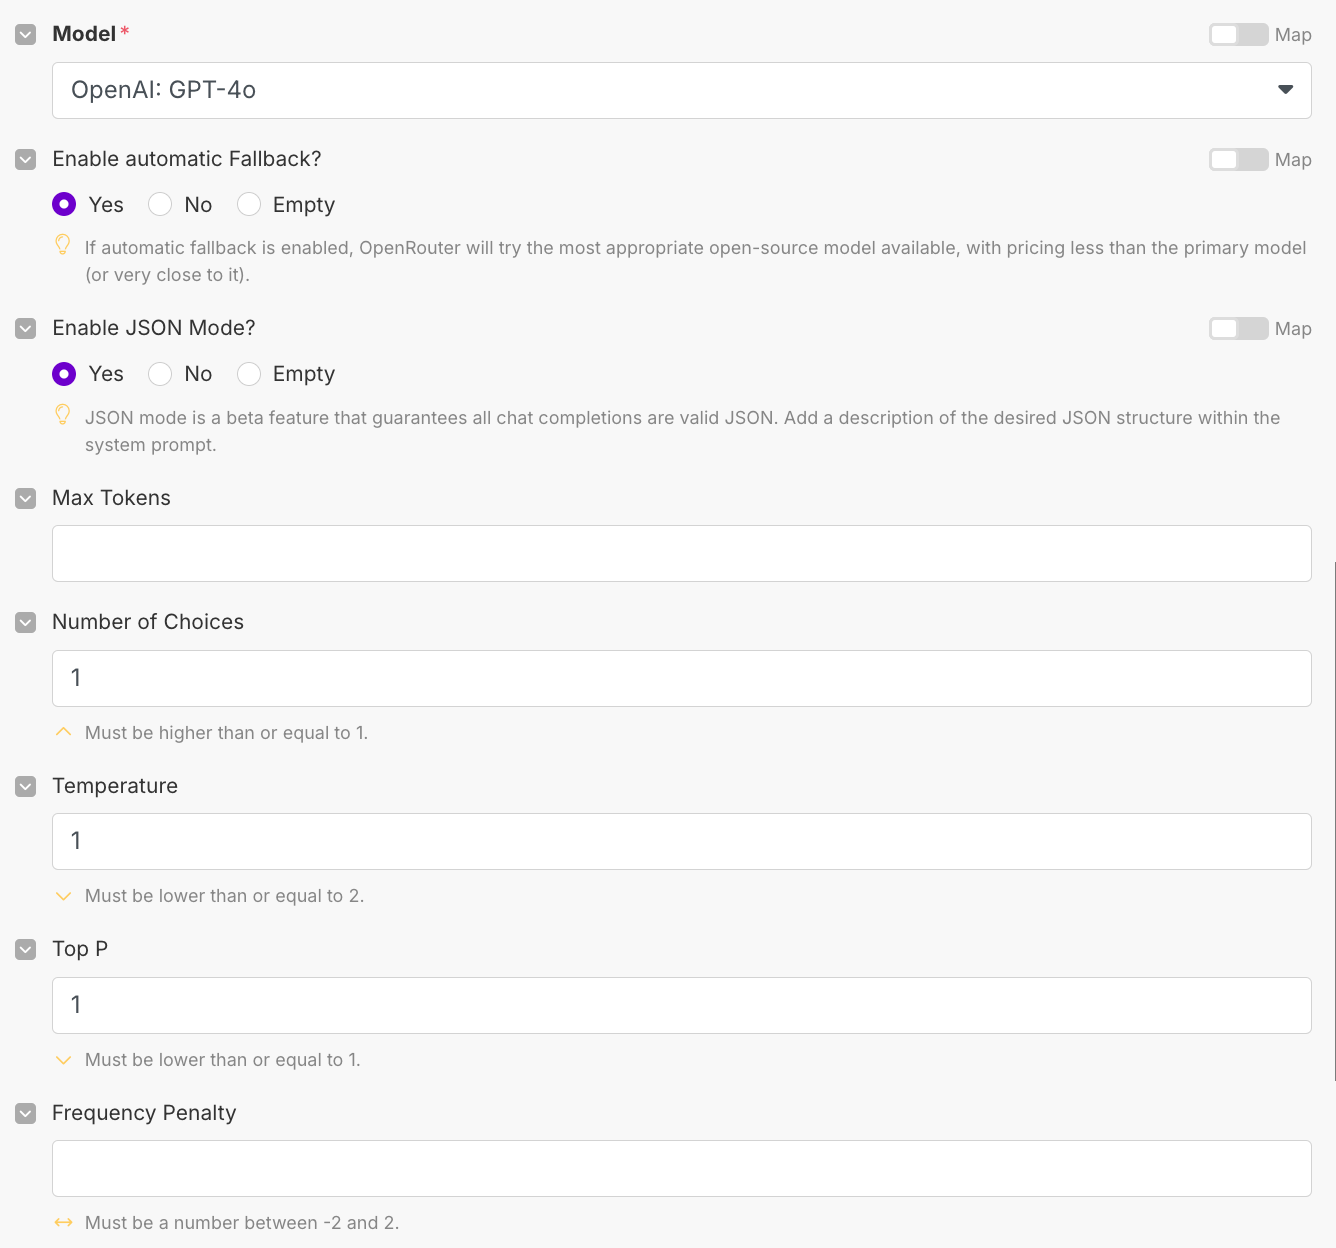
In the advanced setting, I am enabling the fallback, & JSON module (to strict my AI so that it gives the output in JSON format only). The model I am using is OpenAI: GPT-4o since I found that this is the most consistent model. (You can use any model of your choice)
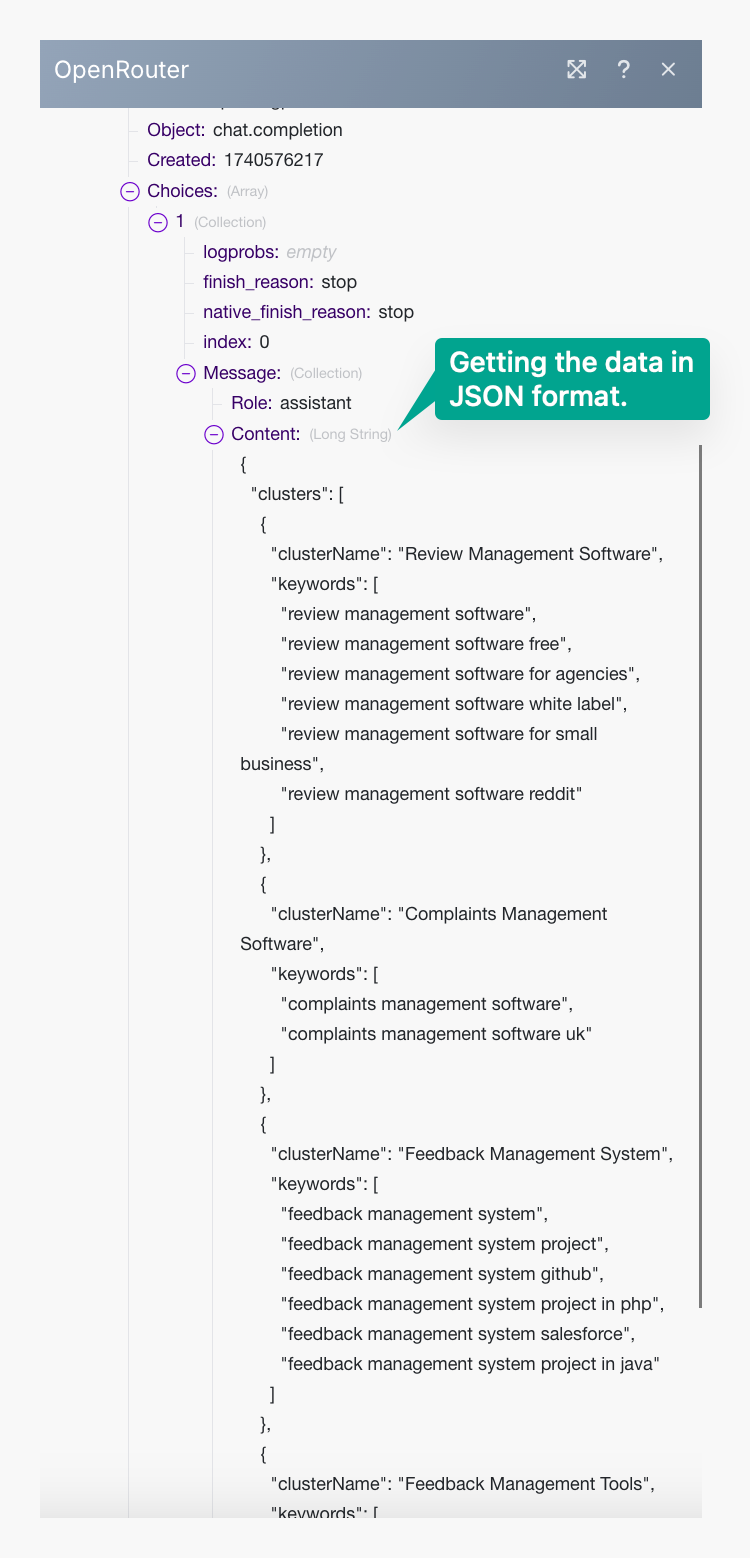
Now, we will test this module, & see the output. As you can see the output data is now in JSON format.
Awesome!! It’s time to parse this JSON data!!
So the next module we will use is “Parse JSON”.
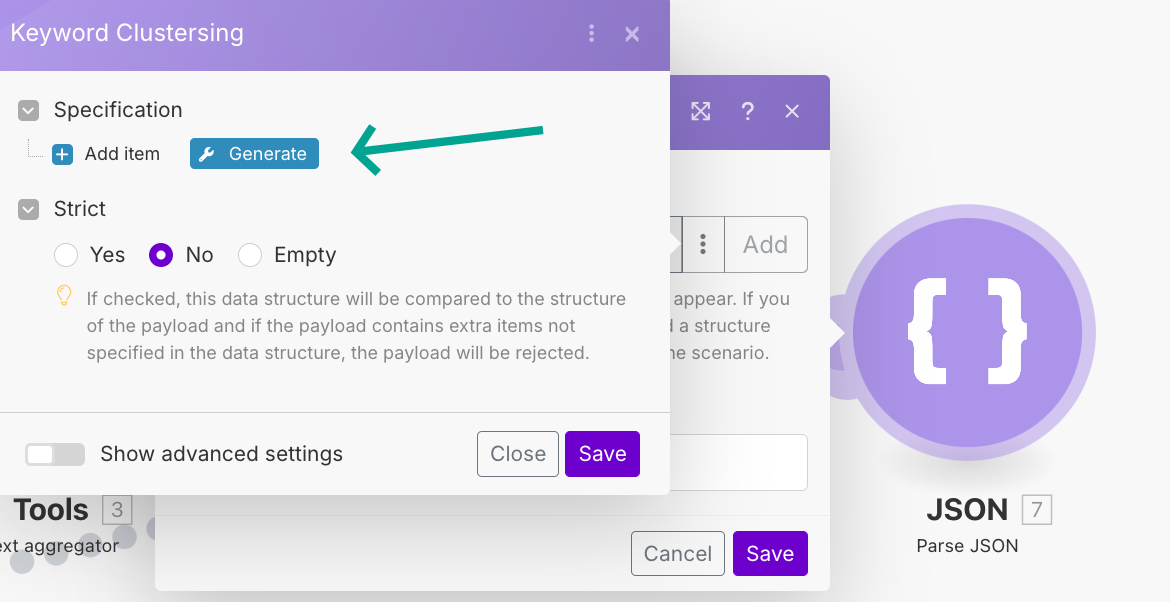
For this module, you need to fill in the sample data so that the module collects that data in relevant fields.
Click Generate and paste the sample data received from the output of our AI model.
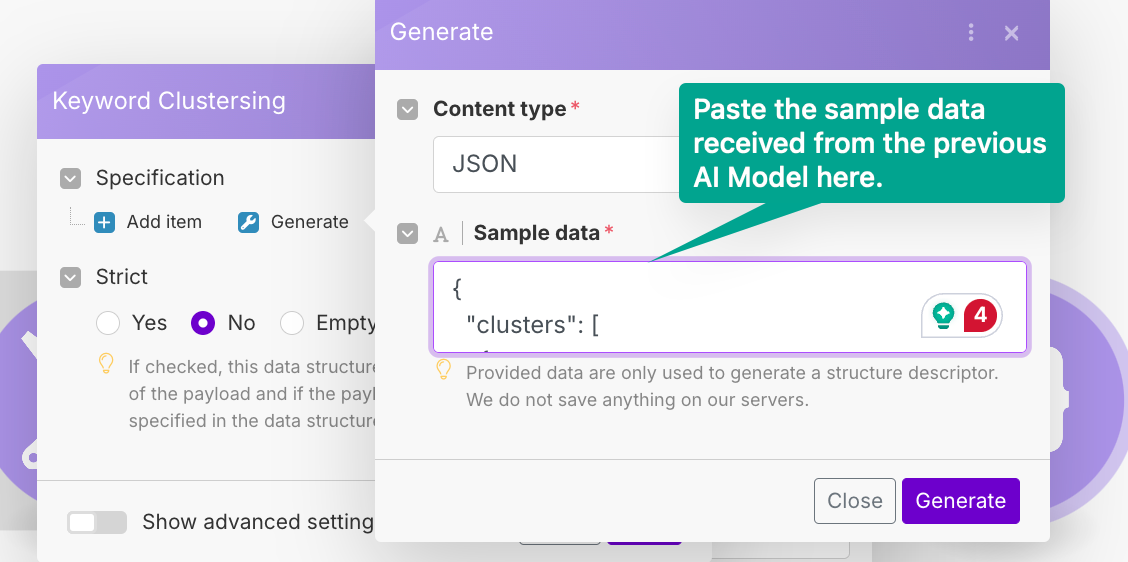
This will generate fields to collect relevant data every time.
For the input, you need to map what data it needs to parse. See the image below ⬇️

Cool, now let’s test this module & see what output data it gives.
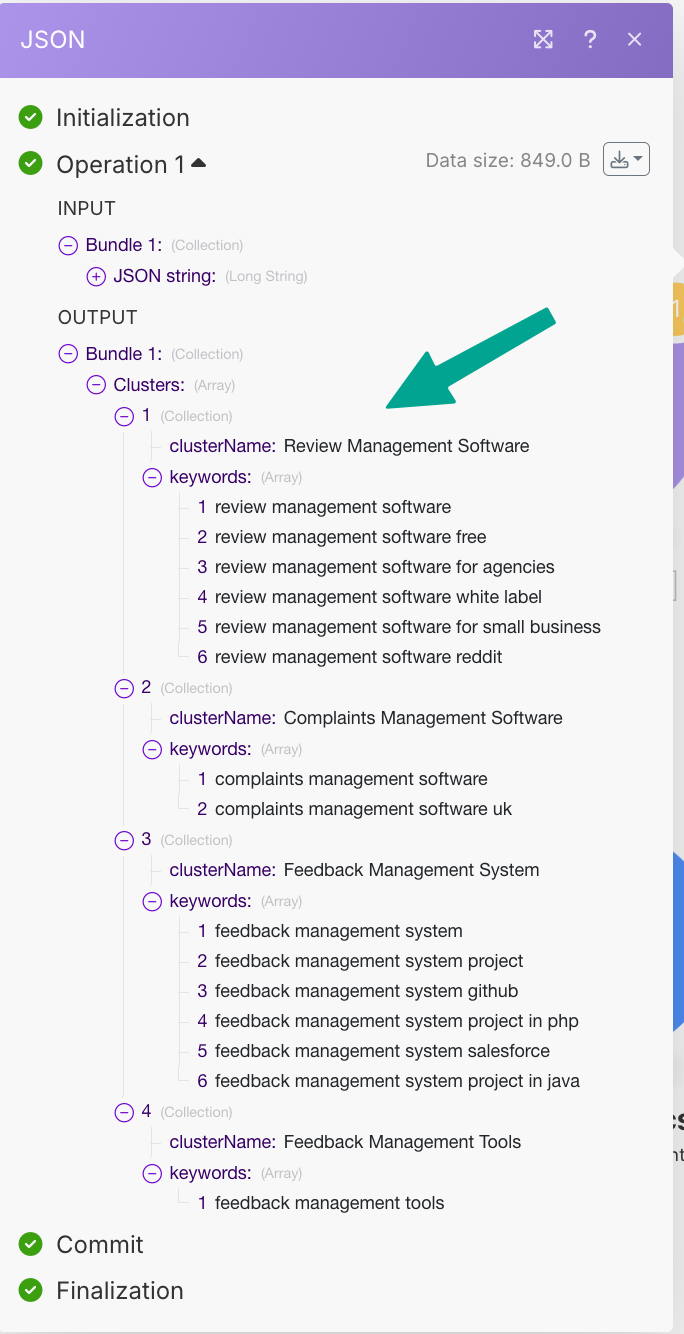
You can see that clusters with different keywords in them are created.
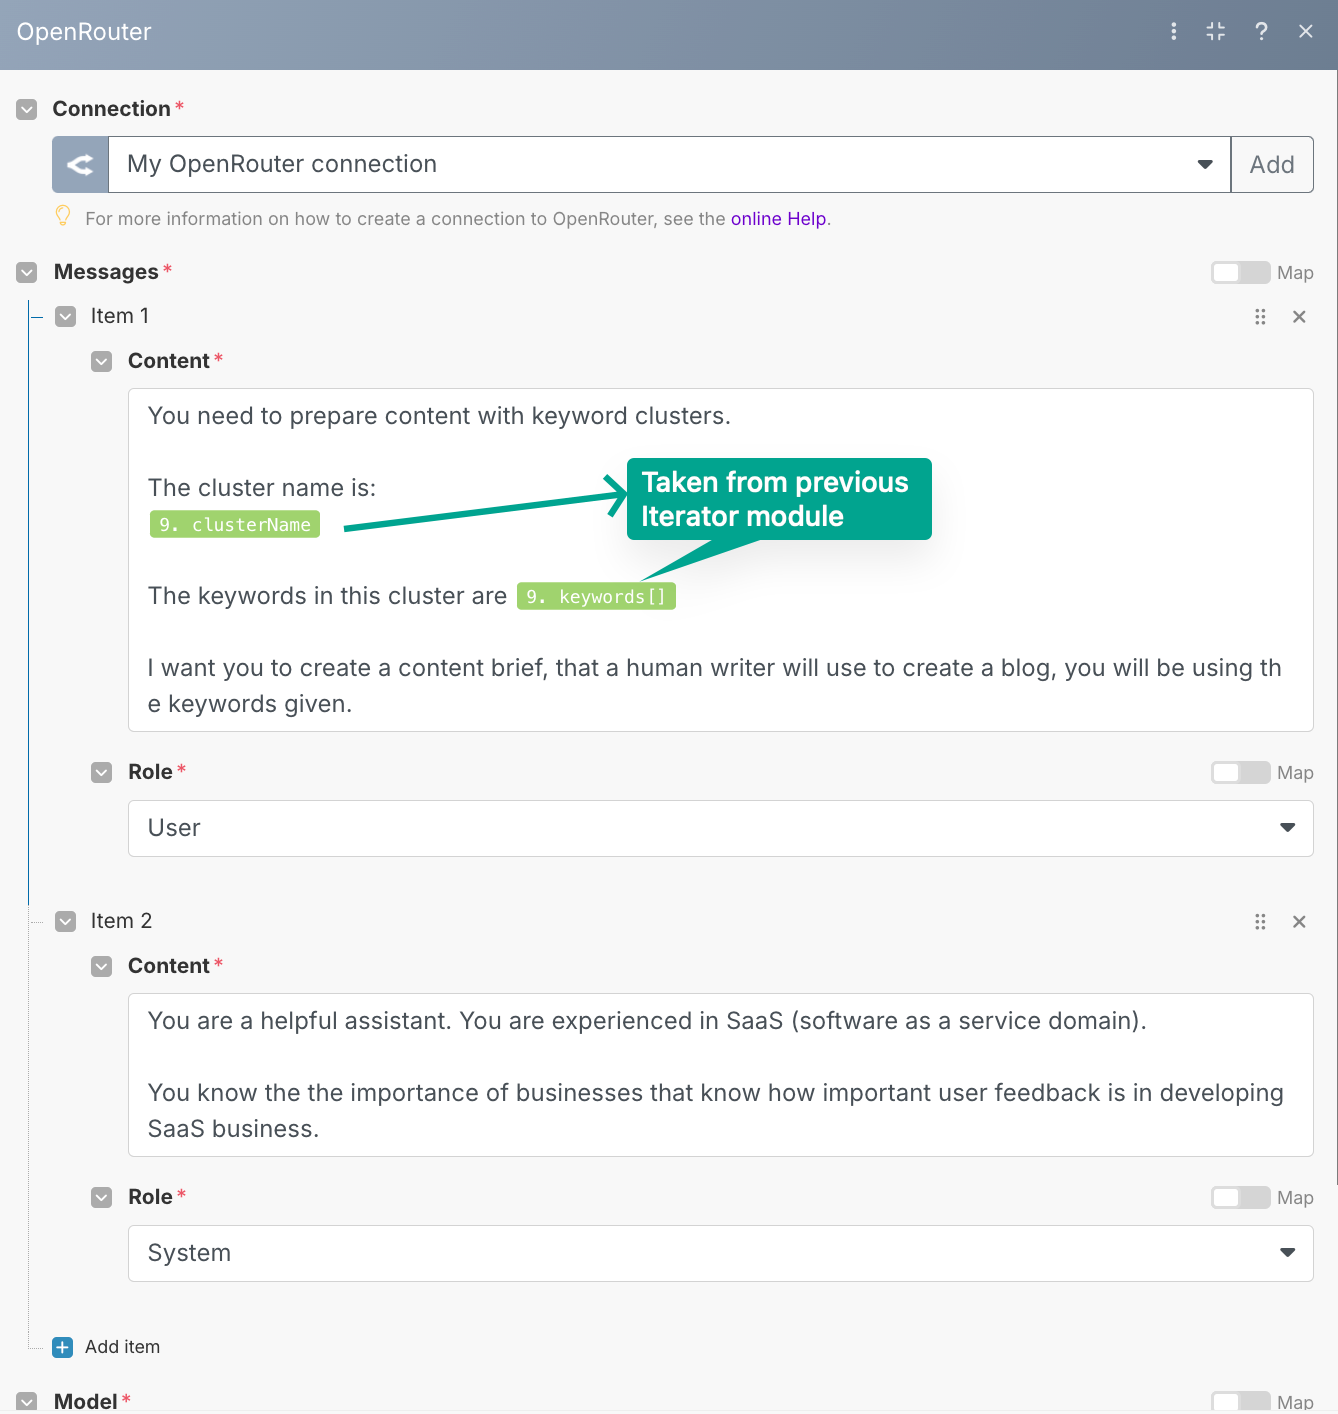
Great, now we want to create content briefings for all 4 clusters we created.
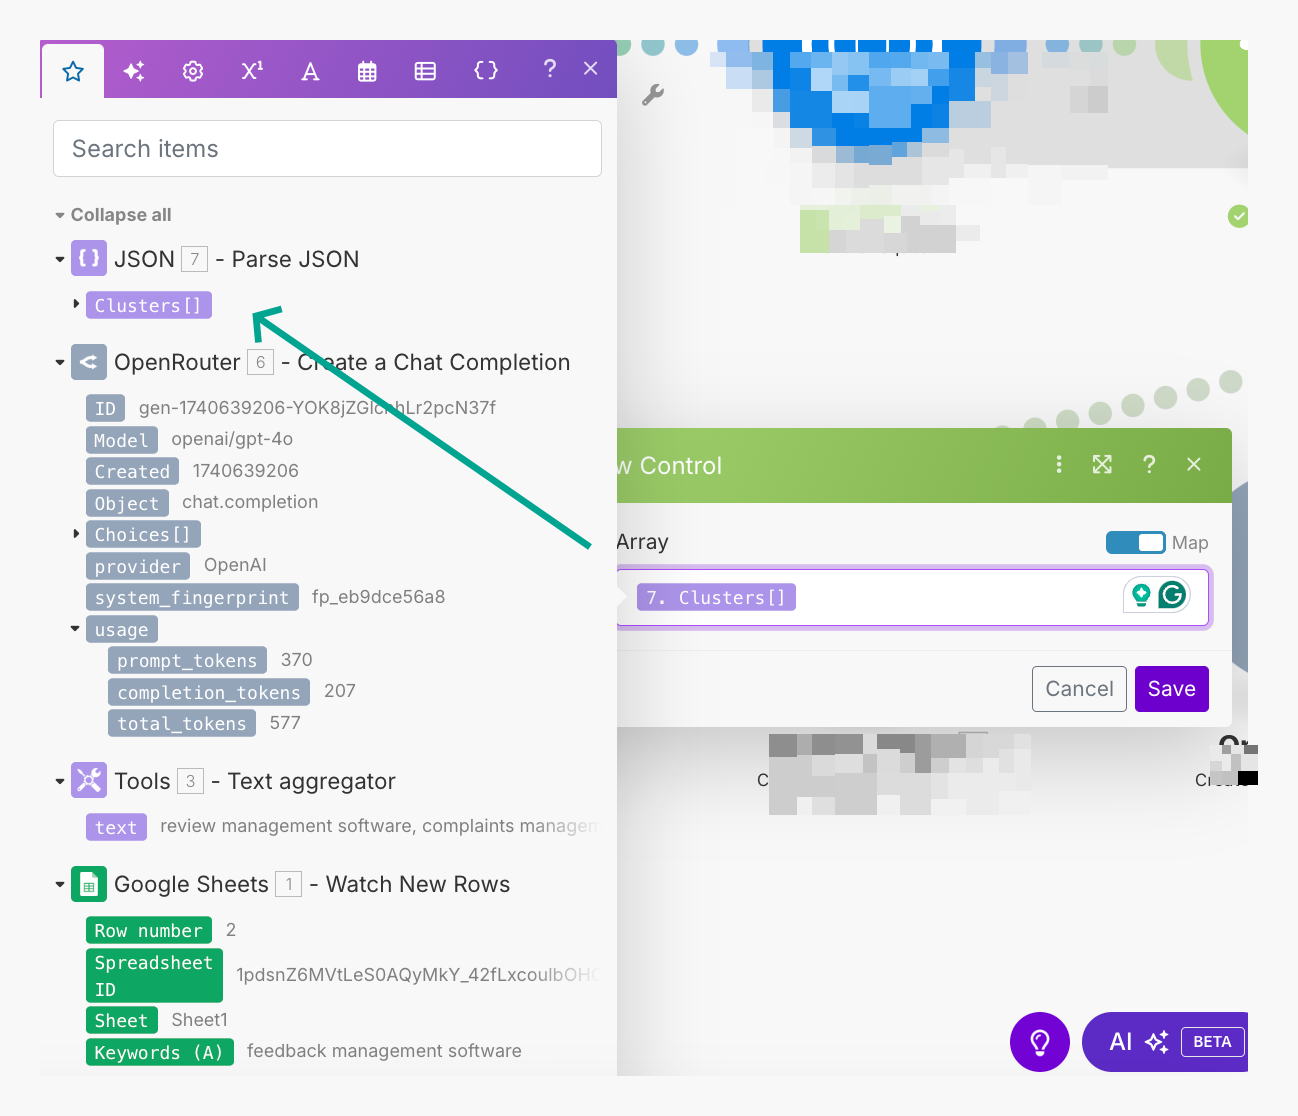
Now we will apply an Iterator that will help to differentiate each cluster with its set of keywords.
The output will be ⬇️
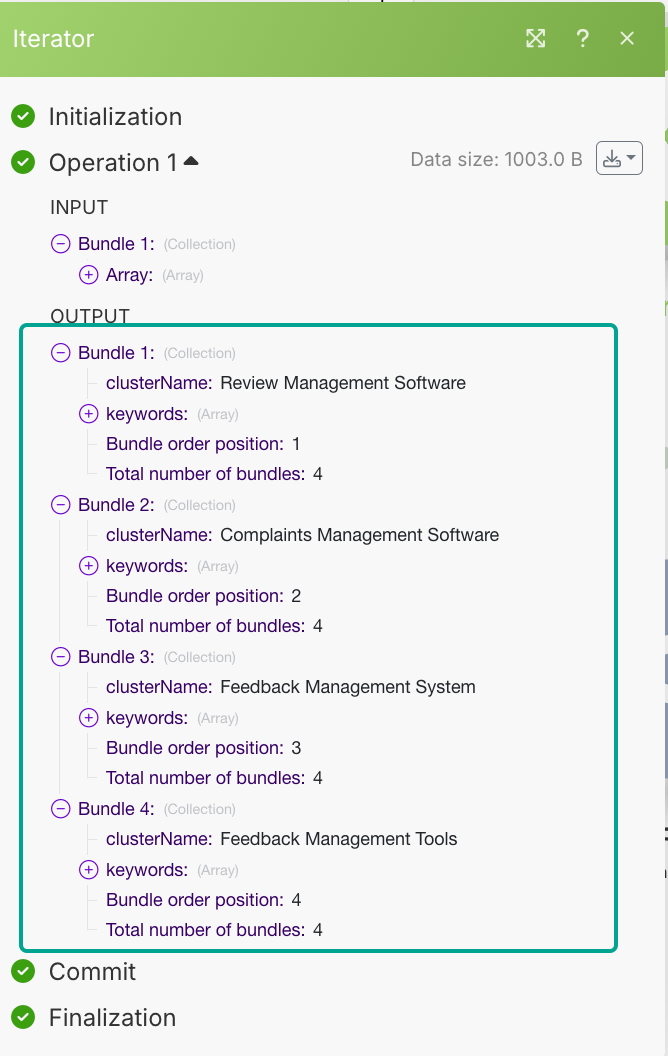
As you can see, we have separated each clusterName with its set of keywords, this way now we can easily feed this detail into our AI model to prepare our content briefings.
Here’s the input I will give to our OpenRouter model ⬇️
You can see the User & System Prompts I have used, the model I have used is OpenAI-4o.
This will create a summary of our article, with the audience the article should be targeting, and what needs to be covered in that article.
Next, we will be again using an AI module, this module will help us to create a headline of the article.
Here’s the prompt I have used in this module. ⬇️
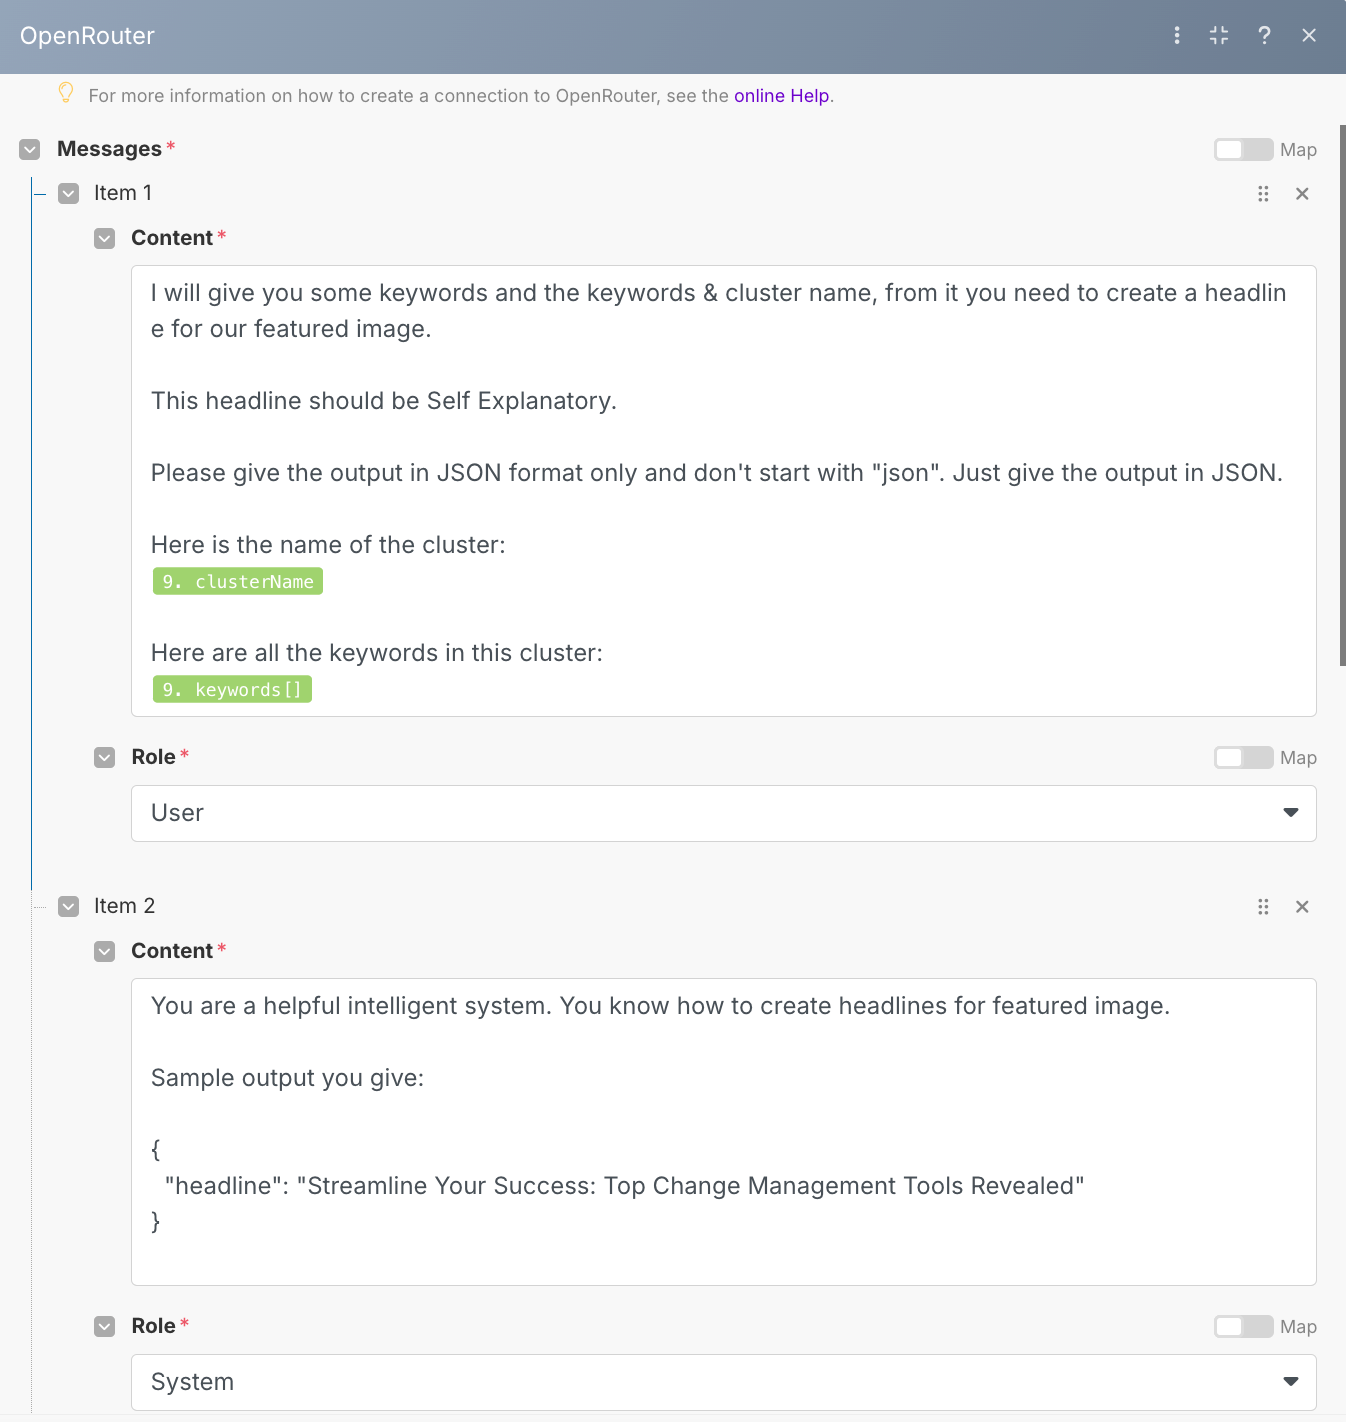
The model used here is OpenAI-4o.
The output it will give is in JSON format.
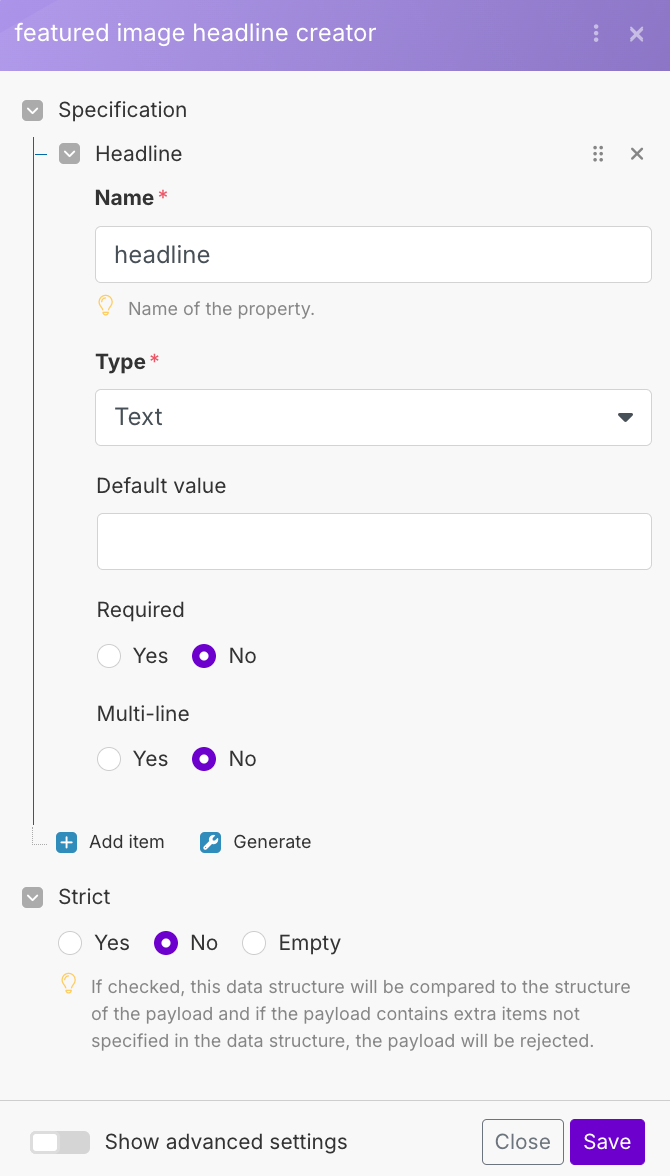
The next module will be to parse the JSON received from this model.
This headline, I am using to create my featured image (I will cover that in my next module)
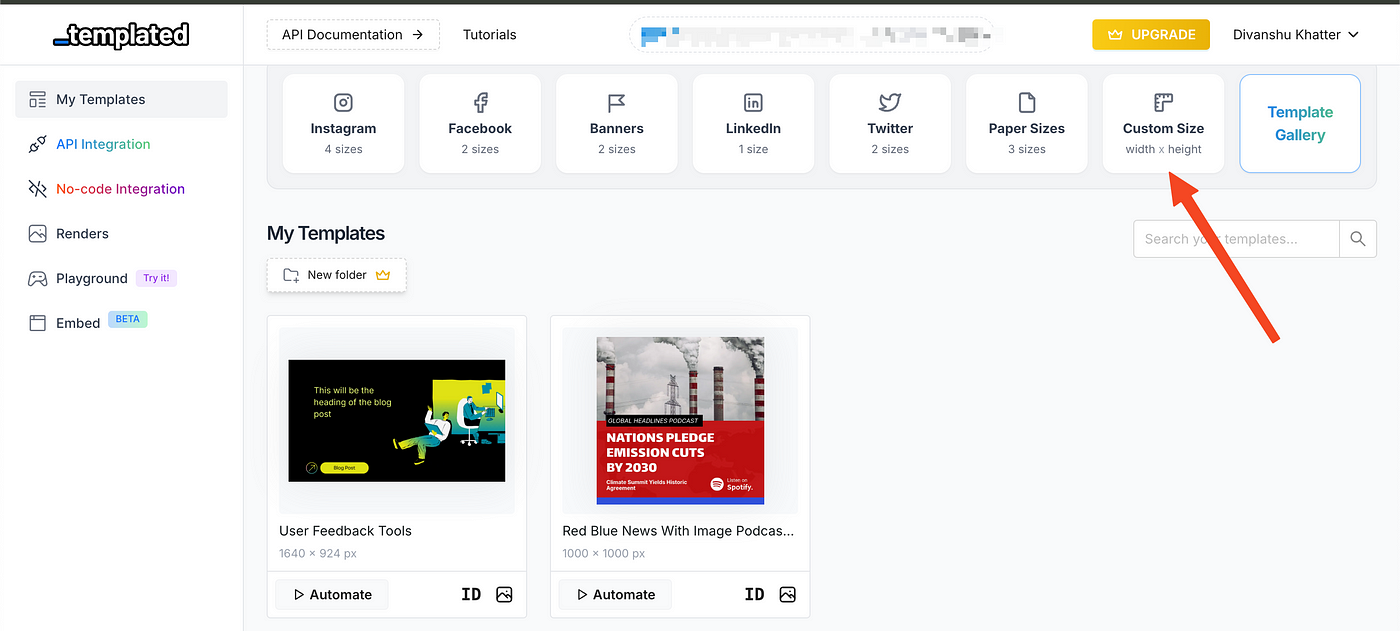
For feature image generation, I am using Templated, which is an image generation API
To use this API, you have to sign up, & it gives 50 free credits to test the API.
Create a new template with the custom size of your featured blog.
A new size will be created, and here you can use a base template from the templates section of this tool, or you can copy/paste it from any tool of your choice.
I have already created the template with the custom size of my featured image.
In the editor, you can see the layers my image has
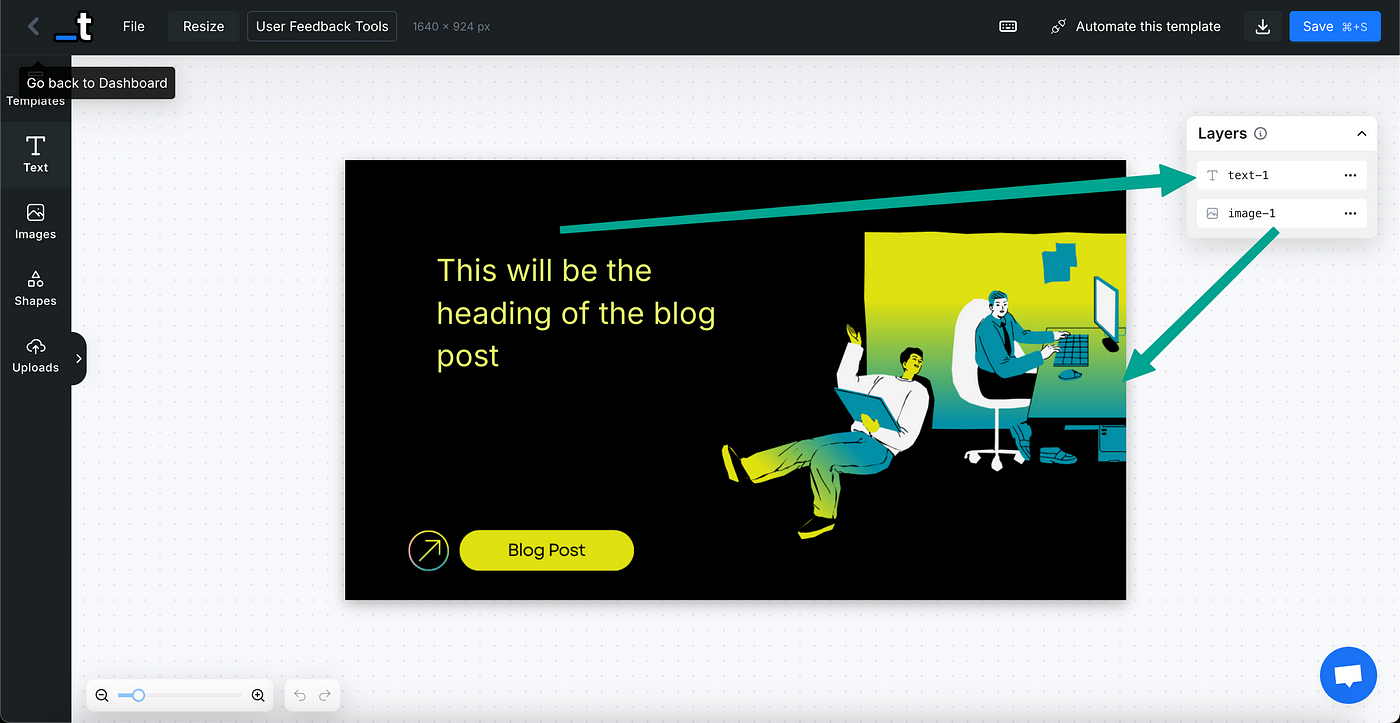
The editor is pretty easy to use, and the founder of this app got on a call to teach me how to use this API.
So, the headline we are generating from the last AI module will go in the layer ‘text-1’ every time a new blog is created, and the base template, which is layer ‘image-1’ will remain constant.
You can, however, change the image also, but that is out of the scope of this blog.
Back to our scenario, add a new module ‘templated’ and choose ‘create a render’
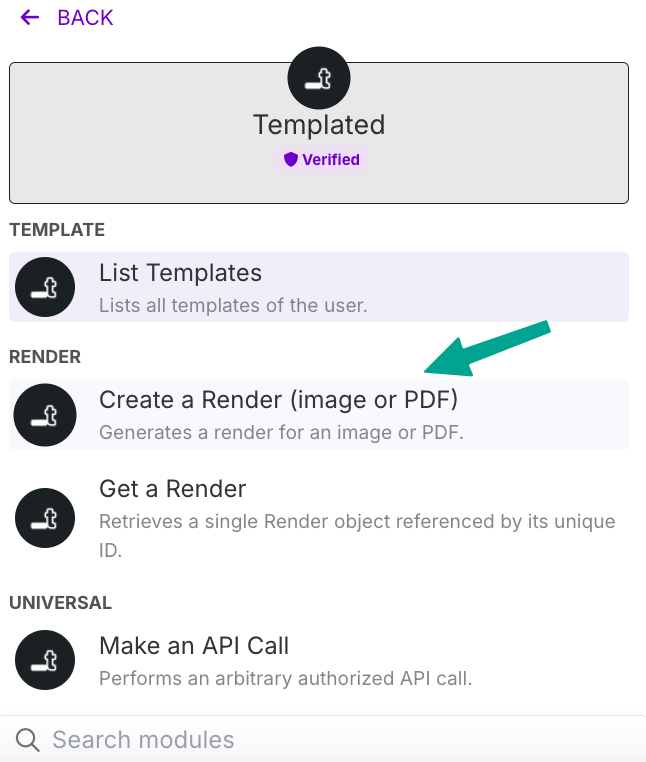
Then, if you are doing it for the first time, it will ask you the API_KEY of your account, which you will get from the templated’s account.
For Template ID, after making a connection, it will give you all the templates you have created in your account.
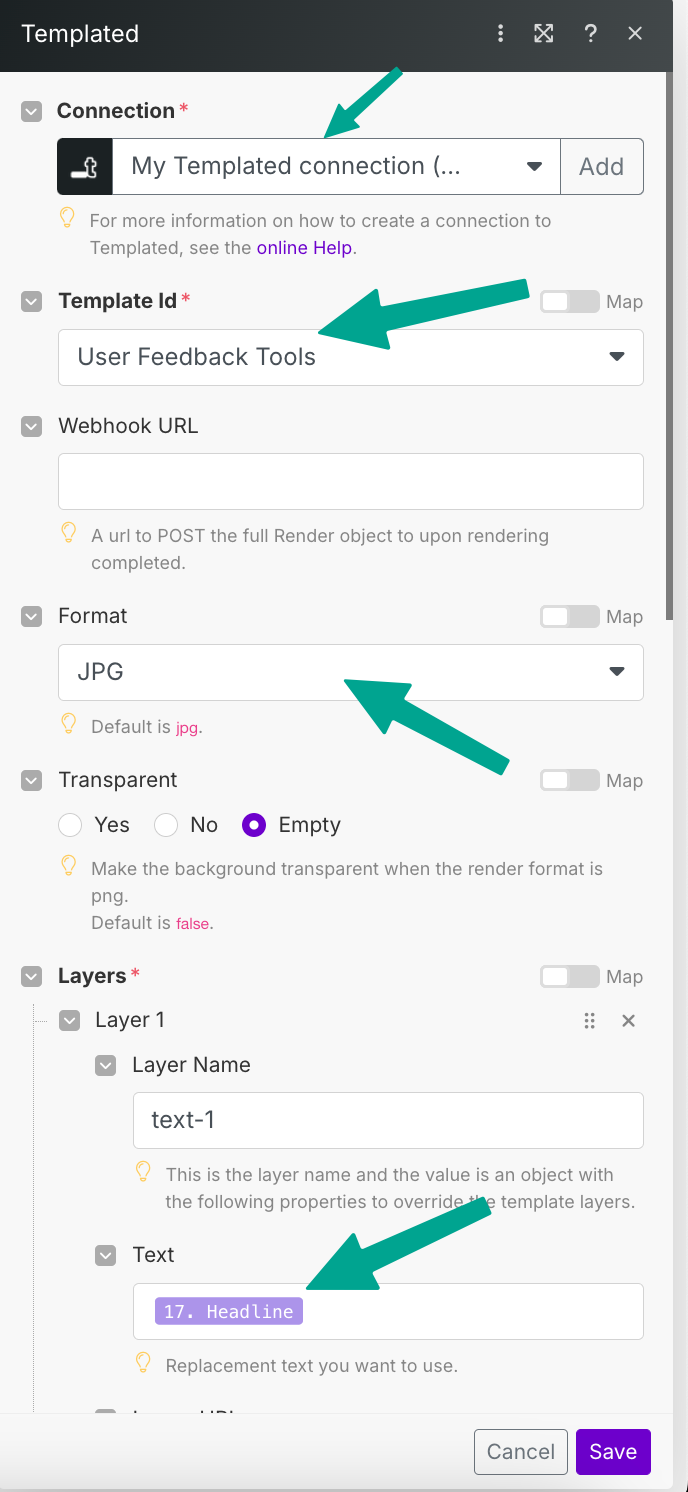
Select the one on which you intend to make changes, for us, the template name is ‘User Feedback Tools’
Select the layers you want to change, we only want to change the text on the image, the layer name is text-1 and we map it to the ‘headline’ from our previous AI module.
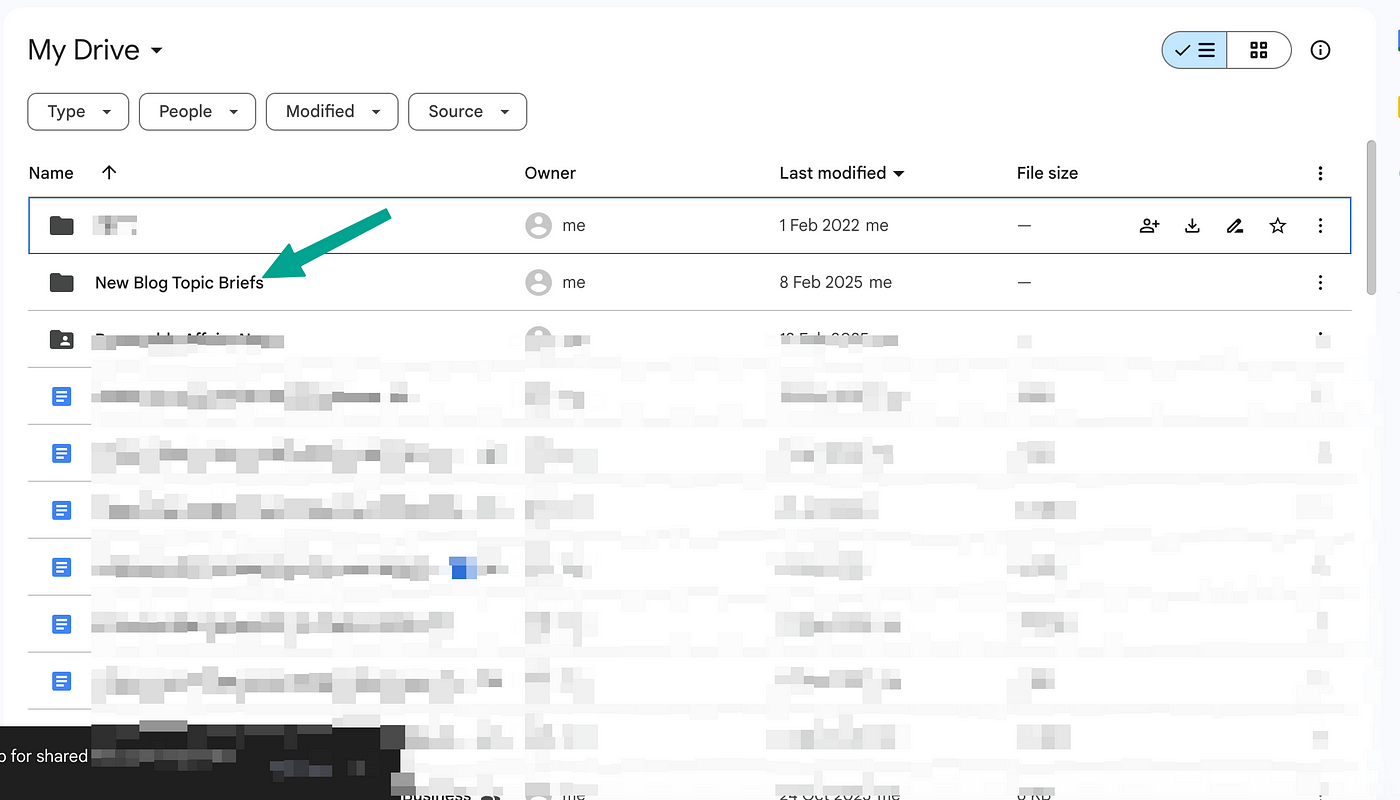
The final part is to make a summary of the article and save it to some storage, we are taking Google Docs to save it all.
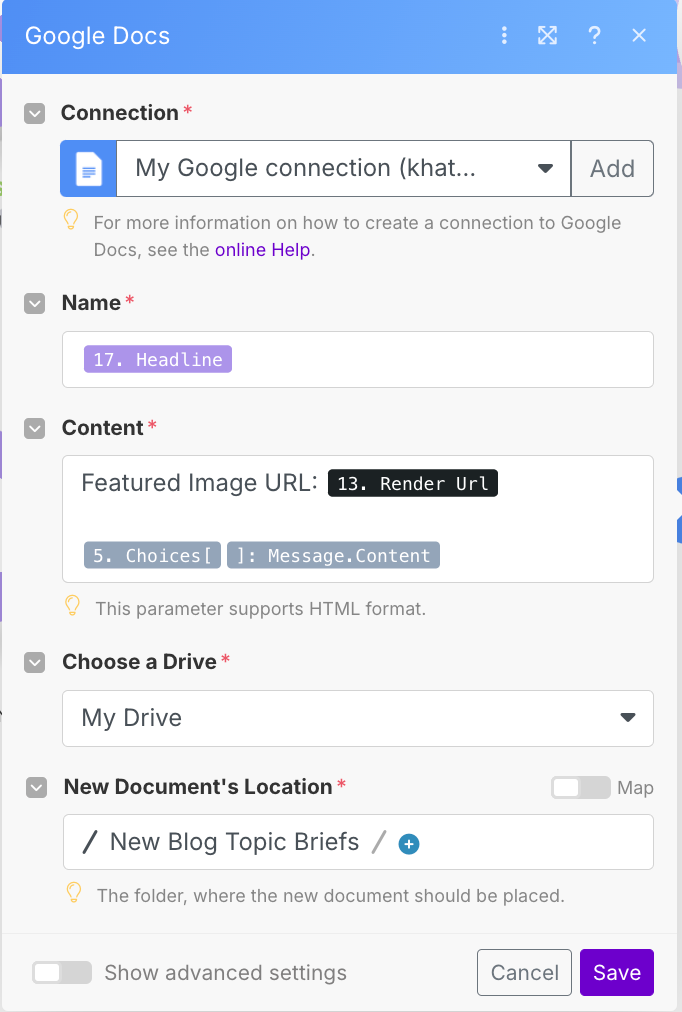
We have already created a separate folder with the name ‘New Blog Topic Briefs’ & all the new topics generated will be saved here.
Let’s run this scenario in real-time & see what output we get.
As you can see, a new doc was there in our folder with the featured Image’s URL.
This way you can summarize content briefs for your content writers easily with Google Autocomplete keywords.