Lately, many new users have been inquiring about this very topic. In this article, we’ll walk through the process of automating data extraction from a Twitter scraper API directly into Google Sheets using Google Sheets’ App Script.
However, this process is not limited to Twitter alone; it can be applied to any dedicated or general web scraping API. Depending on your specific data needs, you can modify the app script function to scrape data according to the documentation, parameters, and endpoint of the particular API you are using.
I hope you already have your API key ready. If not, and you don’t have an account with Scrapingdog yet, you can sign up from here to get 1,000 free credits to start using the API.
Further, I’ll provide a step-by-step blueprint. You can simply copy this spreadsheet, which allows you to access and run your scraper on the go.
Building Google Sheets for Input & Response
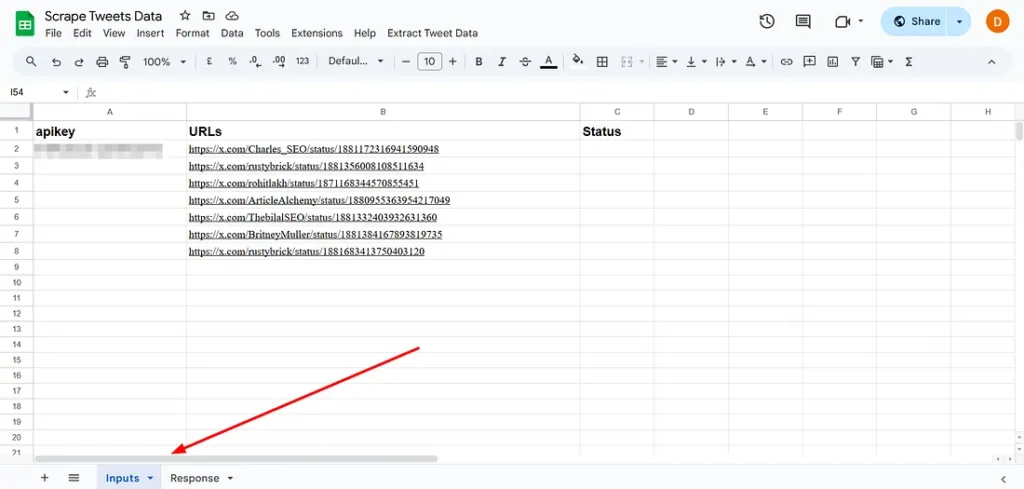
In our Sheets, we will keep 2 tabs, one where we can fill input parameters, and the other tab will take responses.
Scrapingdog’s dedicated Twitter Scraper API takes API_KEY & Tweet URLs as input.
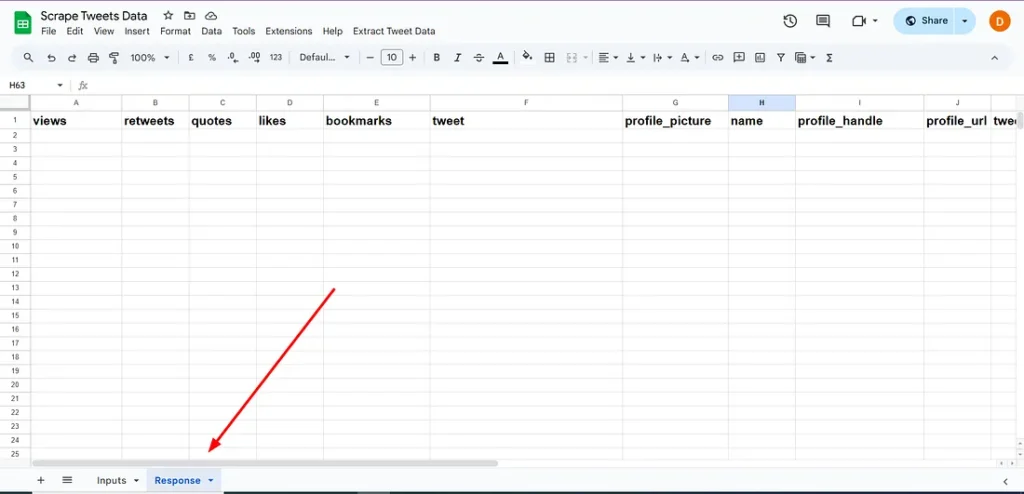
Some of the output data points are views, retweets, quotes, likes name, profile_handle, profile_url & tweet_timing, etc. Check out the documentation, to see the whole output response.
The Response tab is where we will take the output data as is in each different column.
If you already are a customer, you can download the blueprint follow the instructions to copy it, and start extracting the tweets data.
👉Download Your Spreadsheet BluePrint Here👈
If you want to see how the app script is working in our Google Sheet you can follow along. We have used Google sheet’s functionality app script, the script is created to fetch the data and paste it as received from API in the response tab. Below is the app script we have created for this automation.
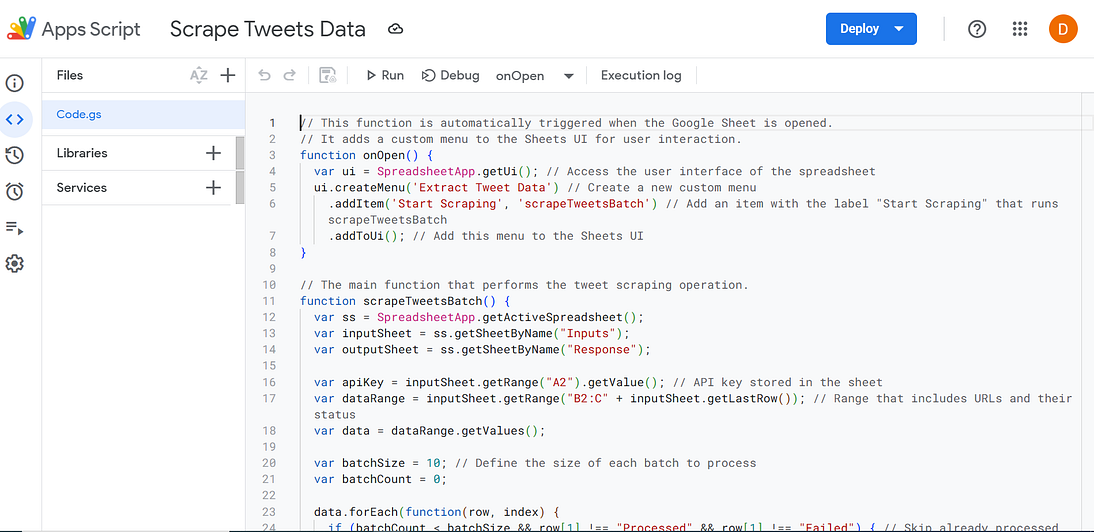
Here’s a brief rundown of how it works:
- Custom Menu Creation: When you open the Google Sheet, our script automatically adds a custom menu titled ‘Extract Tweet Data’ to the Sheets UI. This menu contains an option ‘Start Scraping’ that users can click to initiate the data scraping process.
- Data Scraping: Upon selecting ‘Start Scraping’, the script executes functions to pull data from Twitter via the Scrapingdog API. It fetches tweets based on URLs provided in the ‘Inputs’ tab of the sheet.
- Data Handling: The script processes up to 10 tweets at a time (this is adjustable based on needs and API limits). Each tweet’s data, such as views, retweets, likes, etc., is extracted and then populated into the ‘Response’ tab in the sheet.
- Status Updates: After processing each tweet, the script updates the status next to each URL in the ‘Inputs’ tab to either ‘Processed’ or ‘Failed’, providing clear feedback on the scraping operation’s success or failure.
How Do Our Google Sheets Automation Works?
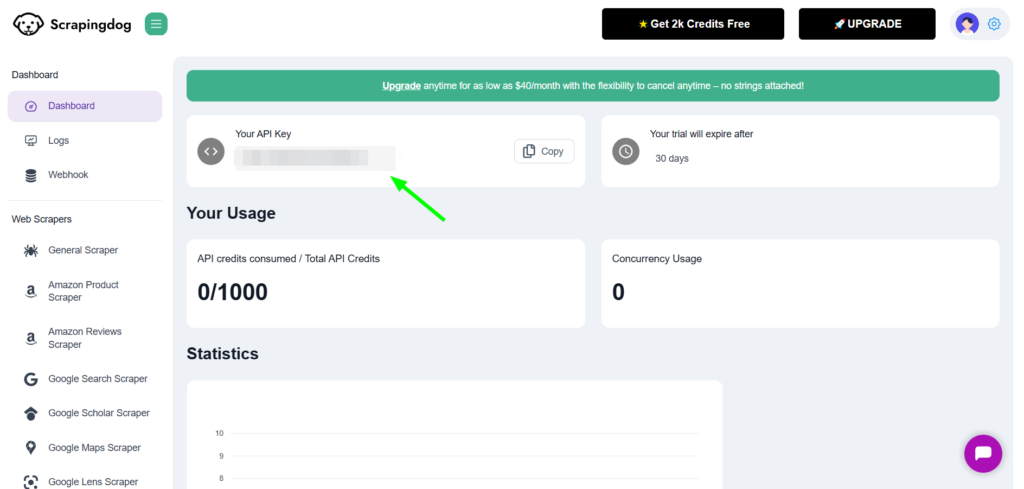
After getting the API_KEY from the dashboard, paste it into A2 of the Inputs tab.
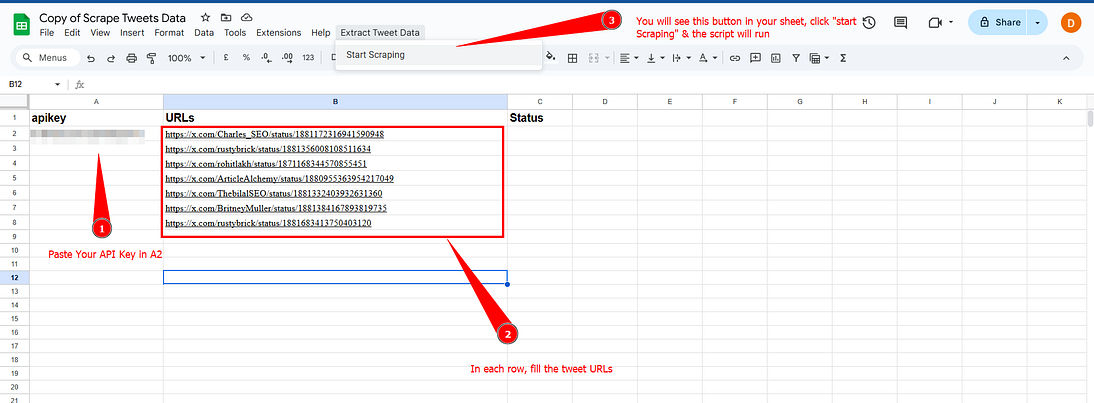
In column B, fill in the tweet URL for which you want data (one URL in each row)
After copying the spreadsheet from the link given above, you will see a button ‘Extract Tweet Data’ ➡ ‘Start Scraping’
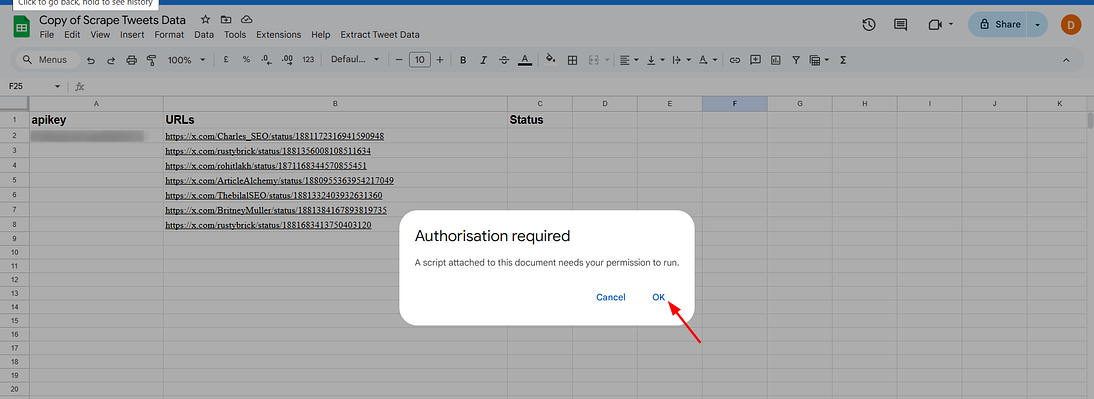
For the first time, authorization will be required, click ok.
Let’s test this script.
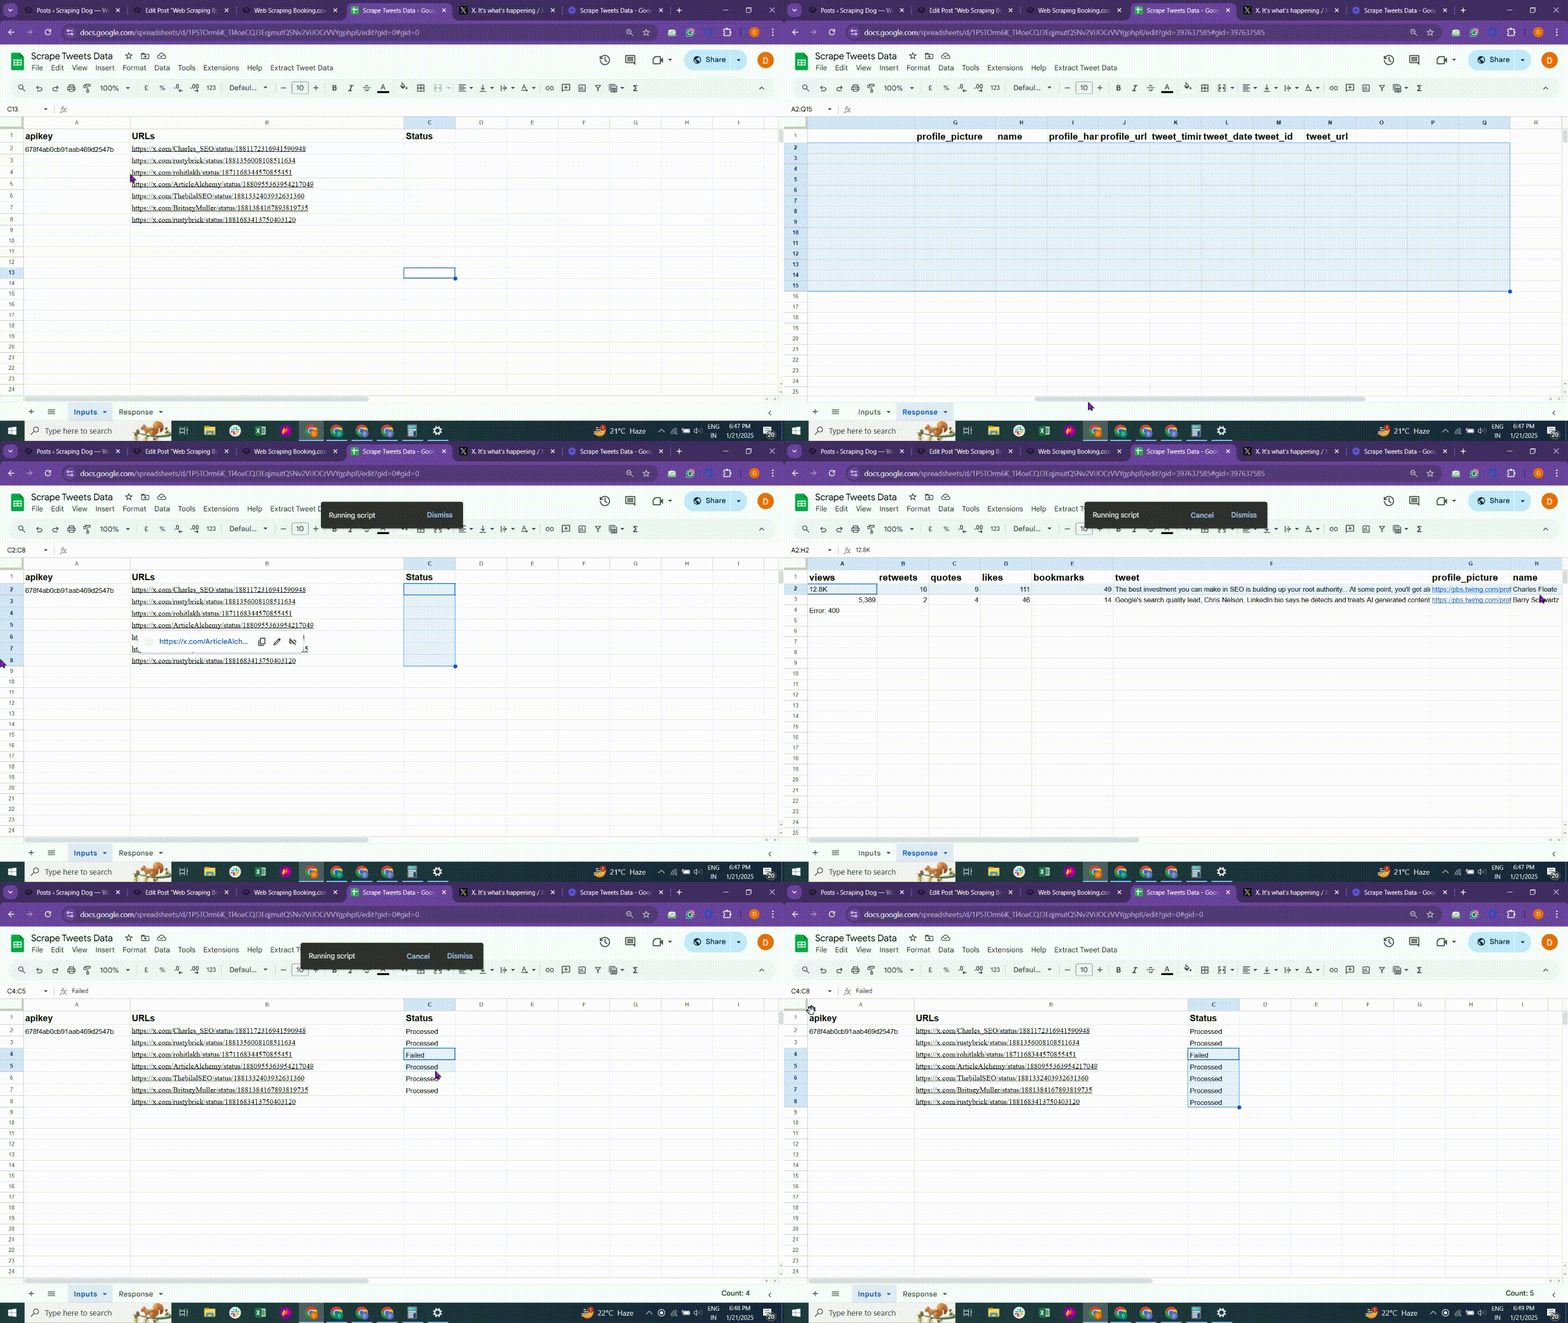
As you can see our script is running perfectly and we are getting the data in our ‘Response’ Tab.
How To Automate This System
In your Google Sheets, Go to Extension ➡ App Script. This will open up our script.
Our function scrapeTweetsBatch is what scrapes the data from the URLs & hence we will schedule run it at our desired time.
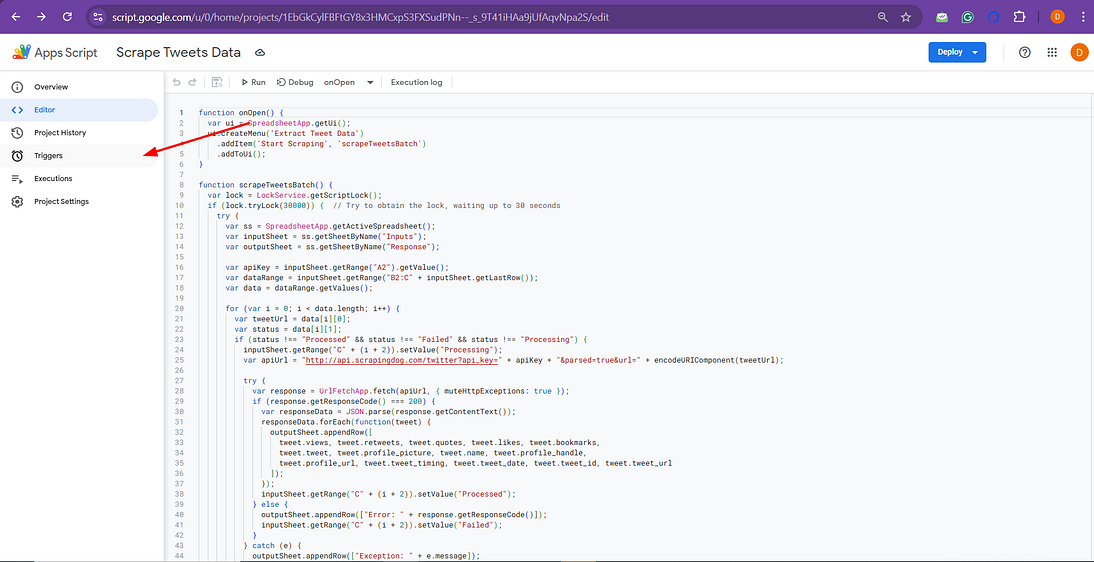
Click Triggers at the left corner, Add a new trigger here.

Choose the following settings, I will explain them below.
Choose the function to run
scrapeTweetBatch because this is the function that scrapes the tweets
Choose which deployment should run:
Head: Runs the most recent version of your script, ensuring any updates are included automatically.
Select event source:
Time-driven: Activates the script at specified times, automating operations without manual input.
Select type of time-based trigger:
Daytimer: Sets the script to run at a specific time each day, ideal for daily data updates.
Select time of day:
Choose the time range for execution, such as “midnight to 1 am,” to run tasks during off-peak hours.
Failure notification settings:
Notify me daily: Sends daily summaries of script errors, helping you promptly manage and rectify issues.
Additional No-Automation Tutorials
- Automating LinkedIn Profile Scraping using Make.com & LinkedIn Scraper API
- Building Make.com Automation To Scrape Google Maps Local Leads into Google Sheets
- Create a Basic Keyword Rank Tracking Automation using Google Sheets
- Building A Stock Automation To Predict The Daily Stock Analysis using News API

