TL;DR
- Playwright + Node.js setup, launch, and first run.
- Scrape flow: load page → grab HTML → parse with
Cheerio(IMDb demo). - Techniques:
waitForSelector, infinite scroll loop, type / click flows. - Use proxies for scale; Playwright is powerful, but for hands-off scaling the article recommends Scrapingdog.
Recently, I wrote an article on how to use Selenium with Node.js and posted it on Reddit. I got zero upvotes and a few comments on it. Most comments suggested using Playwright instead of Selenium for web scraping, so I am doing the same via this read.
We will learn how to use Playwright for scraping, how to wait until an element appears, and more. I will explain the step-by-step process for almost every feature Playwright offers for web scraping.
Setup
I hope you have already installed Nodejs on your machine if not then you can download it from here.
After that, you have to create a folder and initialize the package.json file in it.
					mkdir play
cd play
npm init
Then install Playwright and Cheerio. Cheerio will be sued for parsing raw HTML.
npm install playwright cheerio
Once Playwright is installed you have to install a browser as well.
npx playwright install
The installation part is done. Let’s test the setup now.
How to run Playwright with Nodejs
					const { chromium } = require('playwright');

async function playwrightTest() {
  const browser = await chromium.launch({ headless: false });
  const context = await browser.newContext();
  const page = await context.newPage();

  await page.goto('https://www.scrapingdog.com');
  console.log(await page.title());

  await browser.close();
}

playwrightTest()
This code first imports the chromium browser object from the playwright library. Then we launch the browser using launch() method. Then we navigate to www.scrapingdog.com using goto() method.
The web page’s title is fetched using page.title() and logged to the console. The browser is closed to clean up resources.
Once you run the code you will get this on your console.

This completes the testing of our setup.
How to scrape with Playwright and Nodejs
In this section, we are going to scrape a page from the IMDB.
					const { chromium } = require('playwright');

async function playwrightTest() {
  const browser = await chromium.launch({
    headless: false, // Set to true in production
    args: [
      '--disable-blink-features=AutomationControlled',
      // '--use-subprocess' // Uncomment if needed
    ]
  });

  const context = await browser.newContext();
  const page = await context.newPage();

  await page.goto('https://www.imdb.com/chart/moviemeter/');
  console.log(await page.content());

  await browser.close();
}

playwrightTest()
With page.content() method we are extracting the raw HTML from our target webpage. Once you run the code you will see this on your console.
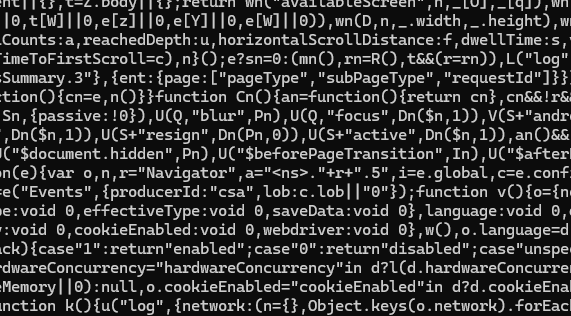
You must be thinking that this data is just garbage. Well, you are right we have to parse the data out of this raw HTML and this can be done with a parsing library like Cheerio.
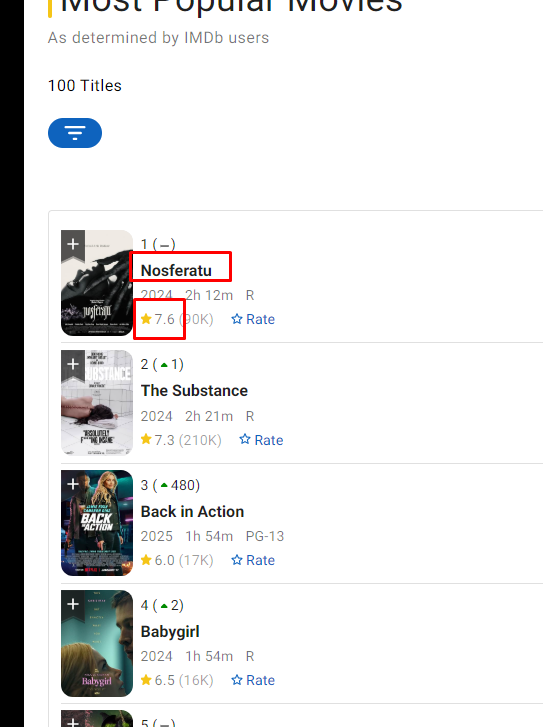
We are going to parse the name of the movie and the rating. Let’s find out the DOM location of each element.
Every movie data is stored inside a li tag with the class ipc-metadata-list-summary-item.

If you go inside this li tag you will see that the title of the movie is located inside a h3 tag with class ipc-title__text.

The rating is located inside the span tag with class ipc-rating-star — rating.
					const { chromium } = require('playwright');
const cheerio = require('cheerio')


async function playwrightTest() {
  let obj={}
  let arr=[]
  const browser = await chromium.launch({
    headless: false,
  });

  const context = await browser.newContext();
  const page = await context.newPage();

  await page.goto('https://www.imdb.com/chart/moviemeter/');
  let html = await page.content()
  const $ = cheerio.load(html);

  $('li.ipc-metadata-list-summary-item').each((i,el) => {
    obj['Title']= $(el).find('h3.ipc-title__text').text().trim()
    obj['Rating']=$(el).find('span.ipc-rating-star').text().trim()
    arr.push(obj)
    obj={}
  })
  console.log(arr)
  await browser.close();
}

playwrightTest()
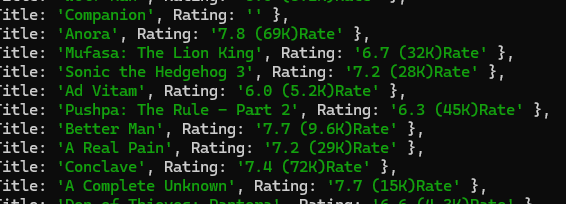
Using each() function we are iterating over all the li tags and extracting Titke and Ratings of all the movies.
Before closing the browser we are going to print the output.
How to wait for an element in Playwright
Sometimes while scraping a website you might have to wait for certain elements to appear before scraping begins. In this case, you have to use page.waitForSelector() function for waiting for an element.
					const { chromium } = require('playwright');
const cheerio = require('cheerio')


async function playwrightTest() {

  const browser = await chromium.launch({
    headless: false
  });

  const context = await browser.newContext();
  const page = await context.newPage();

  await page.goto('https://www.imdb.com/chart/moviemeter/');
  await page.waitForSelector('h1.ipc-title__text')
  await browser.close();
}

playwrightTest()
Here we are waiting for the title to appear before we close the browser.
How to do Infinite Scrolling with Playwright
Many e-commerce websites have infinite scrolling and you might have to scroll down in order to scroll the whole page.
					const { chromium } = require('playwright');
const cheerio = require('cheerio')


async function playwrightTest() {

  const browser = await chromium.launch({
    headless: false
  });

  const context = await browser.newContext();
  const page = await context.newPage();

  await page.goto('https://www.imdb.com/chart/moviemeter/');
  let previousHeight;
  while (true) {
  previousHeight = await page.evaluate('document.body.scrollHeight');
  await page.evaluate('window.scrollTo(0, document.body.scrollHeight)');
  await page.waitForTimeout(2000); // Wait for new content to load

  const newHeight = await page.evaluate('document.body.scrollHeight');
  if (newHeight === previousHeight) break;
}
  await browser.close();
}

playwrightTest()
We are using while(true) to keep scrolling until we no longer have any new content loading. await page.evaluate(‘window.scrollTo(0, document.body.scrollHeight)’) Scrolls the page to the bottom by setting the vertical scroll position (window.scrollTo) to the maximum scrollable height. Once newHeight and previousHeight becomes equal we are breaking out of the loop.
Let’s see this in action.

How to type and click
In this example, we are going to simply visit www.google.com, enter a query, and click on the enter button. After that, we are going to scrape the results using page.content() method.
					const { chromium } = require('playwright');
const cheerio = require('cheerio')


async function playwrightTest() {

  const browser = await chromium.launch({
    headless: false

  });
  const context = await browser.newContext();
  const page = await context.newPage();

  await page.goto('https://www.google.com');

  await page.fill('textarea[name="q"]', 'Scrapingdog');
  await page.press('textarea[name="q"]', 'Enter');
  await page.waitForTimeout(3000);
  console.log(await page.content())

  await browser.close();
}

playwrightTest()
We are simply visiting google.com then we are typing ‘Scrapingdog’ in the search query using fill() method and then using the press() method we pressed the Enter button.

How to Use Proxies with Playwright
If you want to scrape a few hundred pages then old traditional methods are fine but if you want to scrape millions of pages then you have to use proxies in order to bypass IP banning.
					const browser = await chromium.launch({
    headless: false,
    proxy: {
      server: 'http://IP:PORT',
      username: 'PASSWORD',
      password: 'USERNAME'
  }
  });
server specifies the proxy server’s address in the format: protocol://IP:PORT. username and password are the credentials for accessing that private IP. If it is public, you might not need a username and password.
Conclusion
Playwright, with its robust and versatile API, is a powerful tool for automating browser interactions and web scraping in Node.js. Whether you’re scraping data, waiting for elements, scrolling, or interacting with complex web elements like buttons and input fields, Playwright simplifies these tasks with its intuitive methods. Moreover, its support for proxies and built-in features like screenshot capturing and multi-browser support make it a reliable choice for developers.
I understand that these tasks can be time-consuming, and sometimes, it’s better to focus solely on data collection while leaving the heavy lifting to web scraping APIs like Scrapingdog. With Scrapingdog, you don’t have to worry about managing proxies, browsers, or retries — it takes care of everything for you. With just a simple GET request, you can scrape any page effortlessly using this API.
If you found this article helpful, please consider sharing it with your friends and followers on social media!
