The event loop in JavaScript is a key component that allows Node.js to efficiently manage large-scale web scraping tasks.
Unlike languages like C or C++, which use multiple threads to perform tasks concurrently, JavaScript operates on a single-threaded model and handles tasks asynchronously through its event loop.
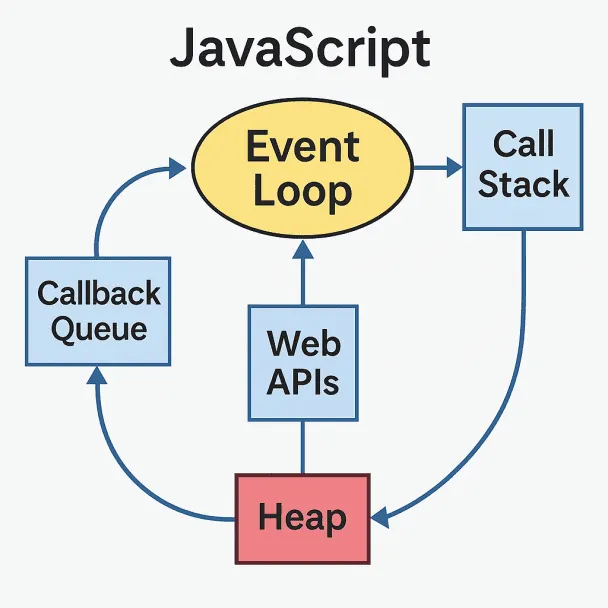
A key distinction in JavaScript is that it doesn’t run code in parallel but rather concurrently.
Confused?
Multiple tasks may start at the same time (like API calls or file reads), but JavaScript processes their results one at a time using the event loop.
It doesn’t execute all functions simultaneously, but it gives the illusion of multitasking by juggling asynchronous operations efficiently.
What are we going to scrape?
Before writing any parsing logic, it’s always a good idea to decide exactly what data you want to extract from the target page.

We’ll be extracting five data elements from this page:
- Product Title
- Product Price
- Stock Availability & Quantity
- Product Rating
- Product Image
Before making any requests, it’s worth inspecting the page structure to locate each element in the DOM. Simply right-click on any element and select Inspect to open Chrome DevTools. This tells you exactly what selectors to target with Cheerio.
Once the page HTML is downloaded via axios.get(), we’ll use Cheerio’s .find() method to locate each element and extract its value.
Identifying the location of each element
Let’s start by searching for the product title.
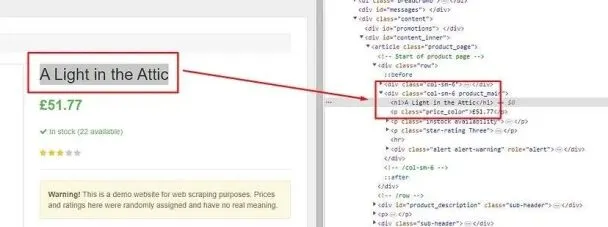
The title is stored inside h1 tag. So, this can be easily extracted using Cheerio.
Find the price tag of the product.
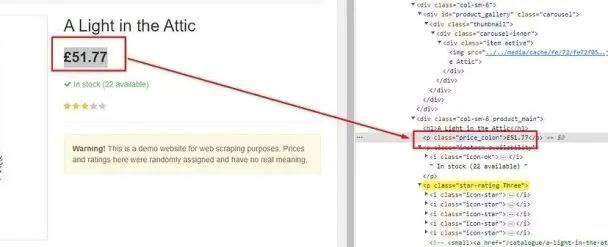
This price data can be found inside the p tag with class name price_color.
Finding the stock data tag
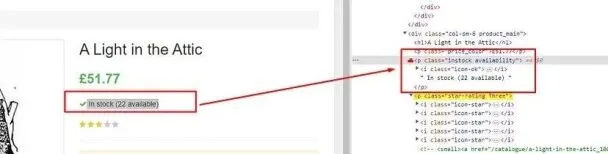
Stock data can be found inside p tag with the class name instock.
Finding the star rating tag
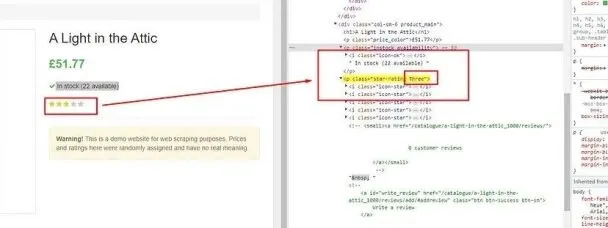
Here, the star rating is the name of the class. So, we will first find this class by the name star-rating, and then we will find the value of this class attribute using .attr() function provided by the cheerio.
Finding the image tag
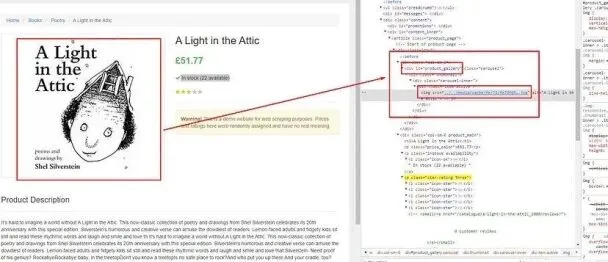
The image is stored inside an img tag, which is located inside the div tag with id product_gallery.
By adding “https://books.toscrape.com” as a pretext, we are completing the URL.
Everything is ready; now, let’s run the code and see what data we get.
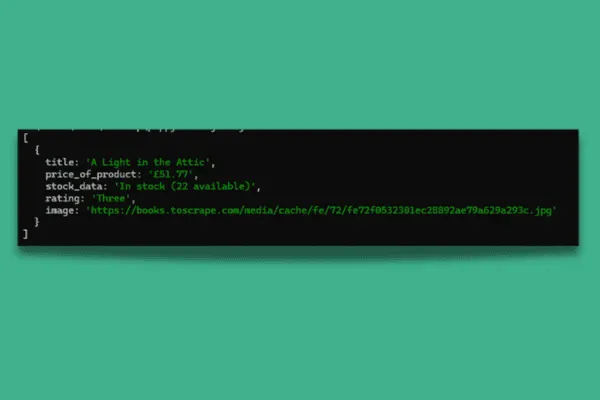
As you can see, we were able to extract all the data we were looking for from the target website using unirest and cheerio.
What is Puppeteer?
Puppeteer is a Node.js library developed by Google that provides a high-level API to control headless versions of the Chrome or Chromium web browsers.
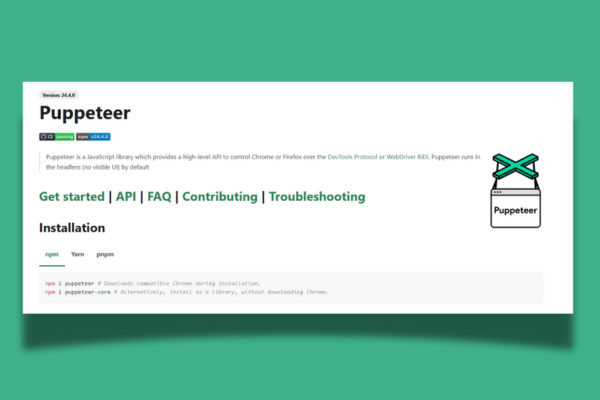
It is widely used for automating and interacting with web pages, making it a popular choice for web scraping, automated testing, browser automation, and other web-related tasks.
Why do we need a headless browser to scrape a website?
- Rendering JavaScript– Many modern websites rely heavily on JavaScript to load and display content dynamically. Traditional web scrapers may not execute JavaScript, resulting in incomplete or inaccurate data extraction. Headless browsers can fully render and execute JavaScript, ensuring that the scraped data reflects what a human user would see when visiting the site.
- Handling User Interactions– Some websites require user interactions, such as clicking buttons, filling out forms, or scrolling, to access the data of interest. Headless browsers can automate these interactions, enabling you to programmatically navigate and interact with web pages as needed.
- CAPTCHAs and Bot Detection– Many websites employ CAPTCHAs and anti-bot mechanisms to prevent automated scraping. Headless browsers can be used to solve CAPTCHAs and mimic human-like behavior, helping you bypass bot detection measures.
- Screenshots and PDF Generation– Headless browsers can capture screenshots or generate PDFs of web pages, which can be valuable for archiving or documenting web content. You can read more about generating PDFs with a headless chrome browser here.
How does it work?
1. Installation:
- Start by installing Puppeteer in your Node.js project using npm or yarn.
- You can do this with the following command:
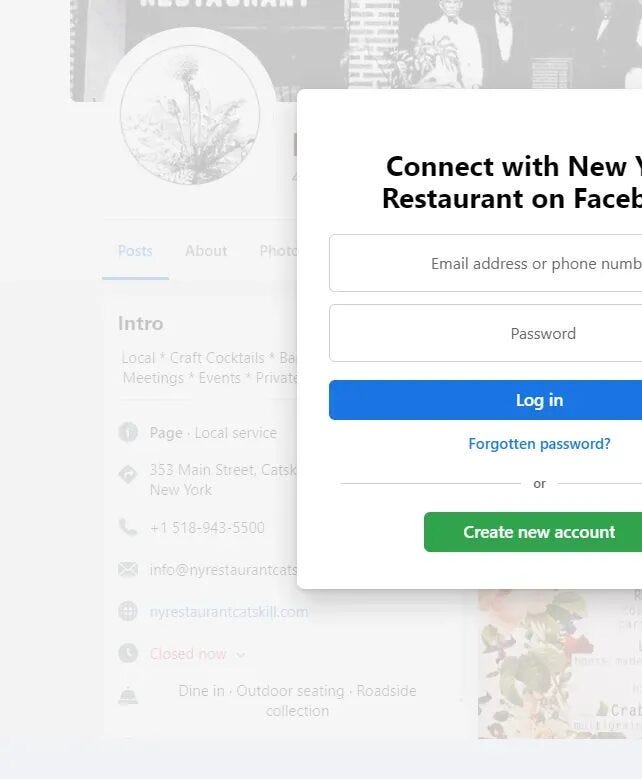
We have selected Facebook because it loads its data through JavaScript execution. We are going to scrape this page using Puppeteer. The page looks like this.

As usual, we should test our setup before starting with the scraping and parsing process.
Downloading the raw data
We will write a code that will open the browser and then open the Facebook page that we want to scrape. Then, it will close the browser once the page is loaded completely.
Let’s break down the code step by step:
scraperis declared as anasyncfunction, allowing it to useawaitto pause execution until each asynchronous operation completes.puppeteer.launch({ headless: false })launches a Chrome browser instance. Settingheadless: falseopens a visible browser window, which is useful for Puppeteer debugging. Switch it totruefor production to run silently in the background.browser.newPage()opens a new browser tab and assigns it to thepagevariable.page.setViewport({ width: 1280, height: 800 })sets the browser window size, simulating a standard desktop screen.page.goto(target_url, { waitUntil: 'domcontentloaded' })navigates to the target URL and waits until the DOM is fully loaded before proceeding.page.waitForTimeout(2000)pauses execution for 2 seconds to allow any additional dynamic content to finish rendering.page.content()retrieves the fully rendered HTML of the page as a string.browser.close()shuts down the browser instance.- The function returns an object containing the HTTP
statuscode and the scrapeddata.
Once you run this code you should see this.
If you see this, then your setup is ready and we can proceed with data parsing using Cheerio.
What are we going to scrape?
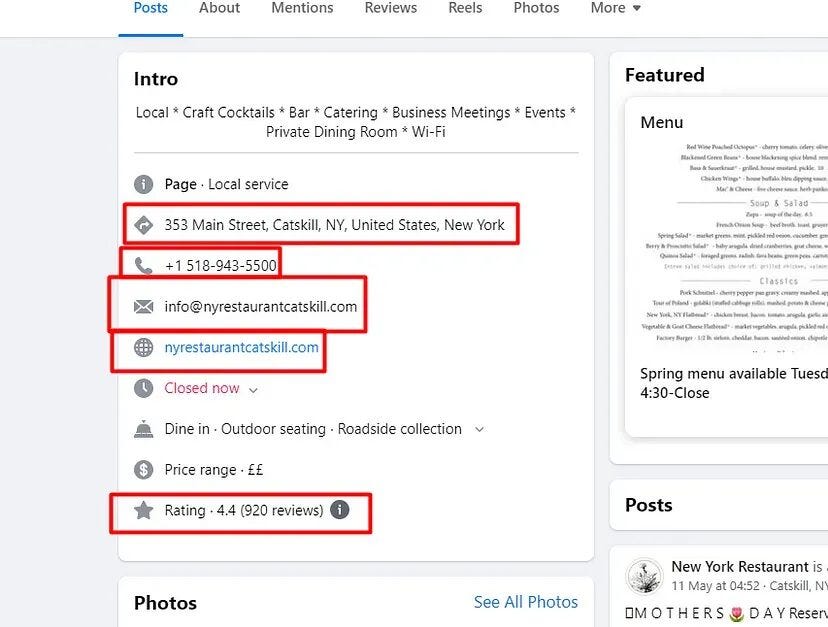
We are going to scrape these five data elements from the page.
- Address
- Phone number
- Email address
- Email Deliverability
- Website
- Rating
Now, as usual, we are going to first analyze their location inside the DOM. We will take support of Chrome dev tools for this. Then using Cheerio We are going to parse each of them.
Identifying the location of each element
Let’s start with the address first and find out its location.

Once you inspect it, you will find that all the information we want to scrape is stored inside this div tag with the class name xieb3on. And then, inside this div tag, we have two more div tags out of which we are interested in the second one because the information is inside that.
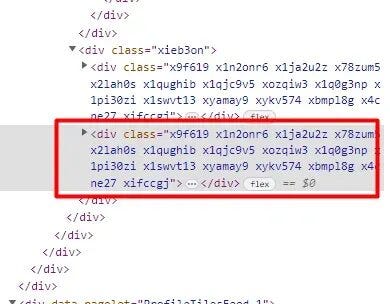
Let’s find this out first.
We have set a condition that only if it is 1 it will go inside the condition. With this, we have cleared our intention that we are only interested in the second div block. Now, the question is how to extract an address from this. Well, it has become very easy now.
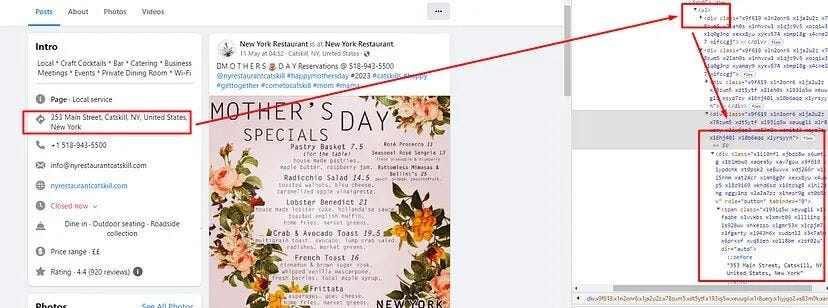
The address can be found inside the first div tag with the class x1heor9g. This div tag is inside the ul tag.
Let’s run it and see the response.
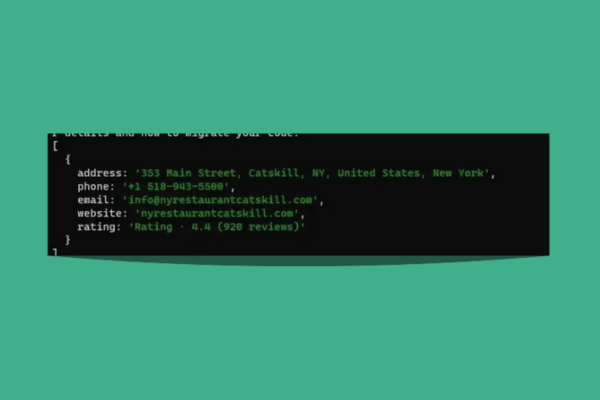
We successfully scraped a dynamic website using JavaScript rendering through Puppeteer. If you’re looking to deepen your understanding of Puppeteer, don’t miss our detailed guide on web scraping with Puppeteer, a powerful tool for handling JavaScript-heavy sites.
Scrapingdog is a web scraping API that uses a new proxy on every new request. Once you start scraping any website at scale, you will face two challenges.
- Puppeteer will consume too much CPU. Your machine will get super slow.
- Your IP will be banned in no time.
With Scrapingdog, you can resolve both issues very easily. It uses headless Chrome browsers to render websites, and every request goes through a new IP.